Troubleshooting with Postman
You can send requests to the tool outside of cobby by sending them to your store's cobby API. If you are looking for a complete list of events and requests for your own developments, check out the list of API requests and API events.
1. Download Postman
Visit getpostman.com and download the desired version for your operating system, then install and run it.
2. Download and import our API request collection.
We have already compiled collections of API requests that you can import into Postman immediately. You can find them in the link below. Just download the collection that matches your cobby version:
• cobby API requests and events
Then click "Import " in Postman.

Select "Import File " and select the downloaded file.

3. Create an environment for your store
You can set up your own environment for each Magento store, so you don't have to keep entering the same data every time you troubleshoot.
Procedure:
- Click the gear icon in the upper right corner of Postman.
- Then click on "Manage Environments".
- Confirm with a click on "Add".
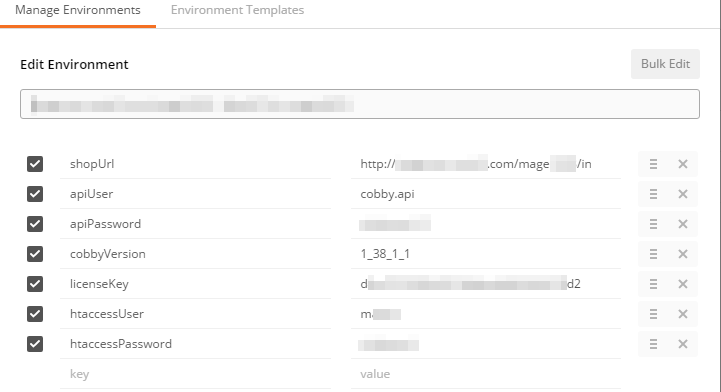
- In the box directly under "Manage Environments" you can name the environment with a name of your choice. Below you will get the following keys with the correct values for your store (see below).

Example:
Note that the keys are in camelCase:
-
shopURL - your store URL including cobbys api path
-
apiUser - cobby user account in your store. Check in the backend under:
System > Configuration > Services / cobby (for Magento 1) or Stores > Settings: Configurations > Services / cobby (for Magento 2)
-
apiPassword - your password for the account
-
cobbyVersion - your cobby version (replace all dots with underscores)
-
licenseKey - your cobby license key
-
htaccessUser
-
htaccessPassword
When everything has been entered, click "Add" again.
4. Our first requirement: Get a session key
To use other requests, you always need a valid session key first. You can get it by selecting Login (Magento1) from the collection on the left and clicking "Send".
(If you are troubleshooting Magento 2, click "instead").
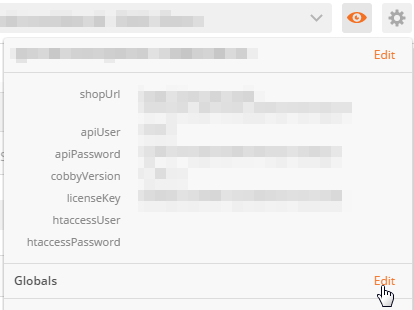
- Copy the result without quotes, then click the eye icon in the upper right corner and edit globals by clicking "Edit".

- Select the session key as the new global and paste the previously obtained session key.
- Click "Save" to save your key. You are now ready to make further requests to your store. When the session key expires, repeat this step.
5. Our second requirement: Export an attribute
- Get a session key, then click on Attribute (Info) and then on "Body".
- Then overwrite the text AttributeID with your attribute ID and press "Send".
