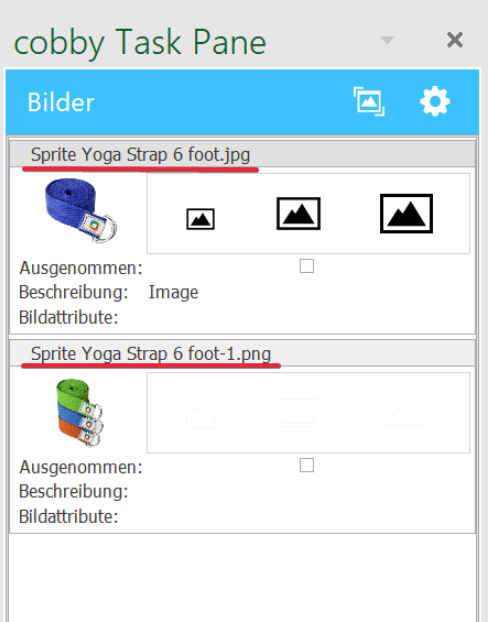
Image description
This step-by-step guide shows how to edit or add the description of an existing image.
**Saving formulas in help columns: **
- Since the first row for all existing products is now stored in a template/table, store the formula in the first row of the table.
- With a double click on the lower right corner of the cell the formula is used for all products. The cursor looks like a ➕.
Add image description
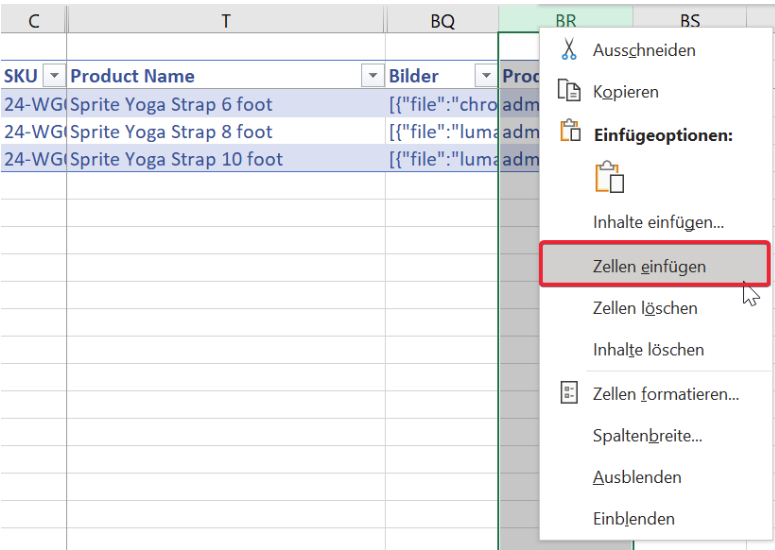
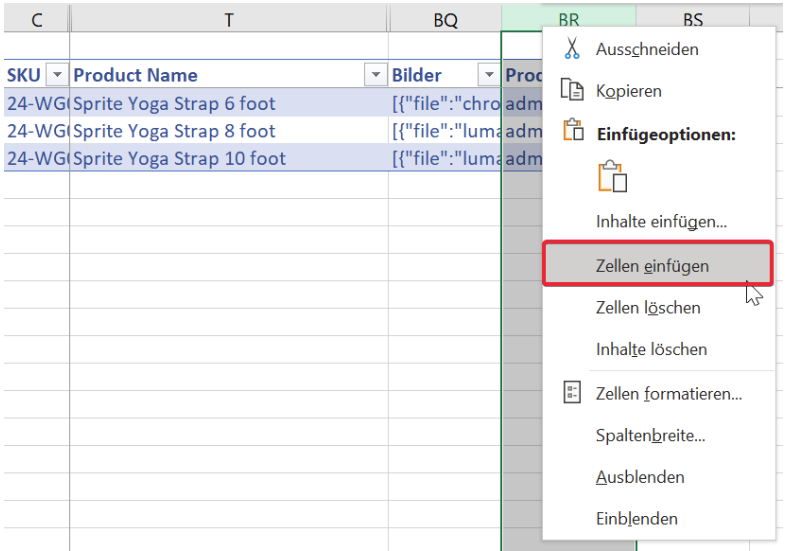
Step 1: Create help columns
Go to the Images column and create a help column: Right click → Insert cells.
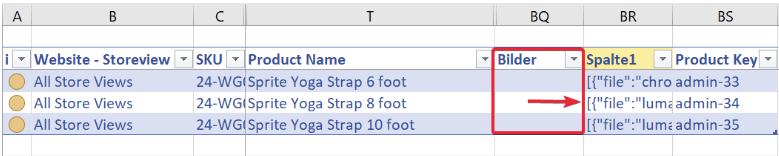
Step 2: Copy contents
Copy the content from the Images column to the Help column and then delete the content from the Images column.
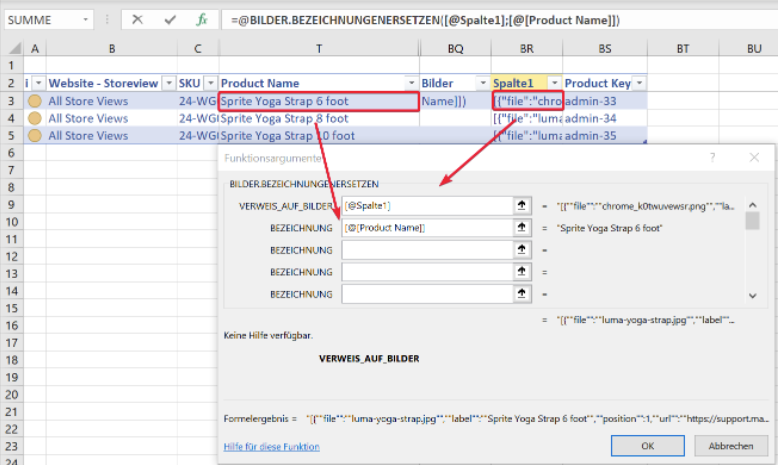
Step 3: Select category and function
Click on fx (1) → category cobby (2) → BILDER.BEZEICHNUNGENERSETZEN (3). Confirm the selection with "Ok".

Step 4: Store help column
Now a new window opens. In the first column the help column must be deposited. Under NAME the name column is specified:
- REFERENCE_TO_IMAGES (VERWEIS_AUF_BILDER) → Column1
- BEZEICHNUNG → Product name or the desired column
Step 5: Add image description
Add the image description.
So that the other products also receive an image description, the formula can be pulled down and then saved.
But please note that the text must be adjusted.
Formula =@BILDER.BESCHREIBUNGENERSETZEN([@Spalte1];"1:"&[@[Product Name]]&"-Hose vorne";"2:"&[@[Product Name]]&"-Hose hinten")

Replace image name
Step 1: Create a help column
Go to the Images column and create a help column: Right-click → Insert Cells.
Step 2: Copy content in the help column
Copy the content from the Images column to the help column.
Then delete the in on the image column.

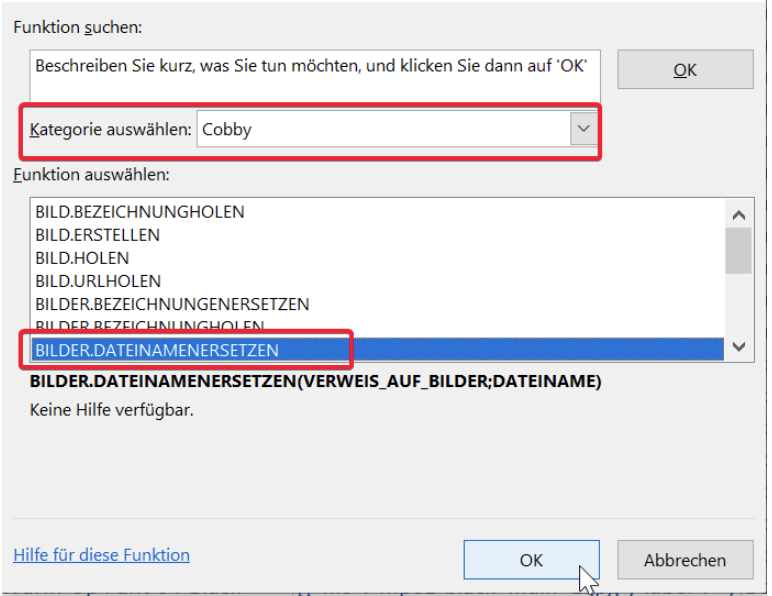
Step 3: Insert function
Click on fx → category cobby → BILDER.DATEINAMENERSETZEN → Ok
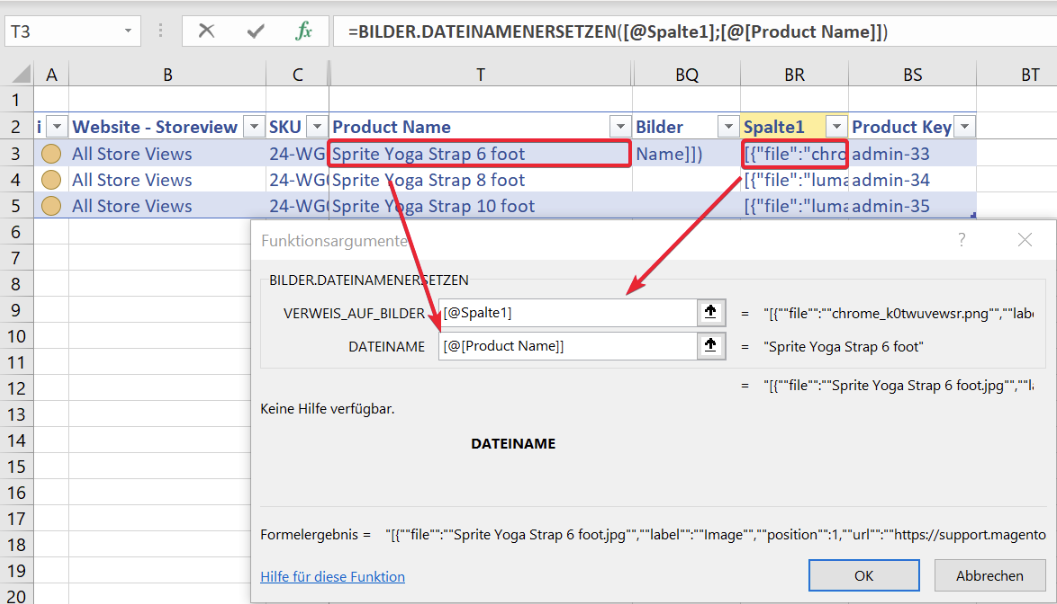
Step 4: Function details
A new window opens. In the first column the help column must be deposited, with the file name the name column.
Step 5: The image name is added
However, if multiple images exist, the images will all be given the same name.