Sorting the supplier list using Power Query
This article describes how to use Power Query to sort the columns from a supplier list so that the values can be imported into cobby via copy-and-paste.
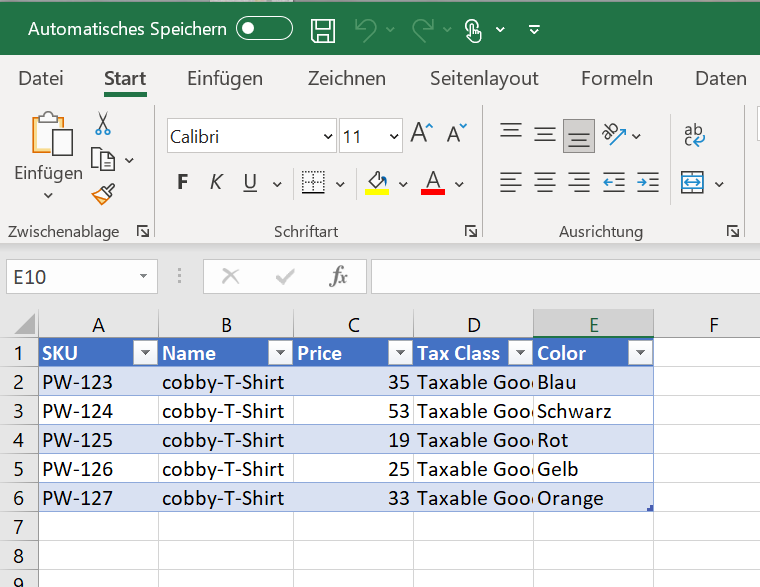
Step 1: Supplier list
In the first step we need the supplier list.
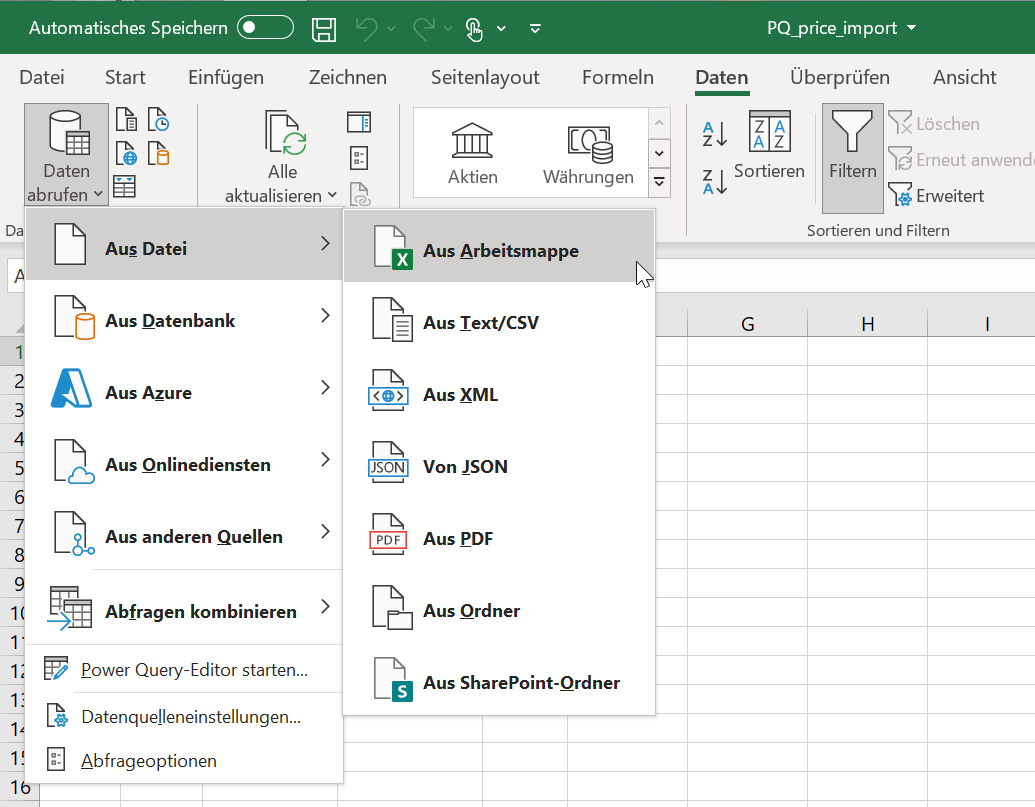
Step 2: Name Excel sheet
Open an empty Excel sheet and save it as an empty sheet first.
Give your list a unique name, e.g. PQ_price_import.
Step 3: Choose supplier list
Open the newly created list and proceed as follows: Data → Retrieve data → From file → From work sheet → Choose your supplier list.
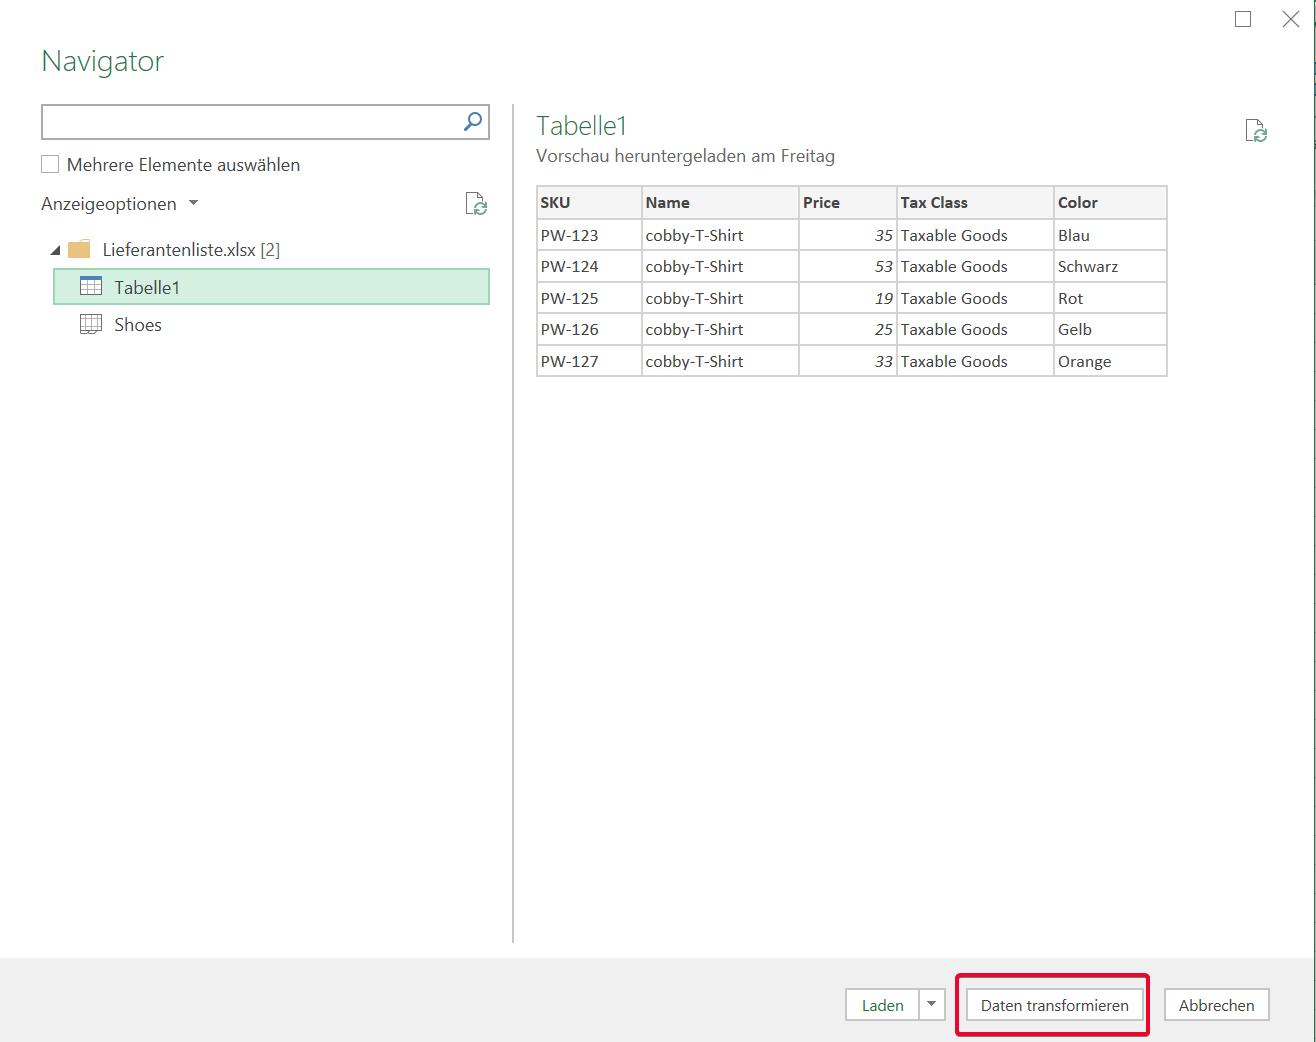
Step 4: Transform data
After the supplier list has been selected, the navigator opens in a new mask. Click on the table name and go to "Transform data".
Step 5: Sort columns
As soon as Transform data has been clicked, another table opens.
The columns can be sorted now.
Please note that the columns must be identical to the cobby columns if you would like to import by copy-and-paste.
Important! If you would like to close the table, click on Close & Load.
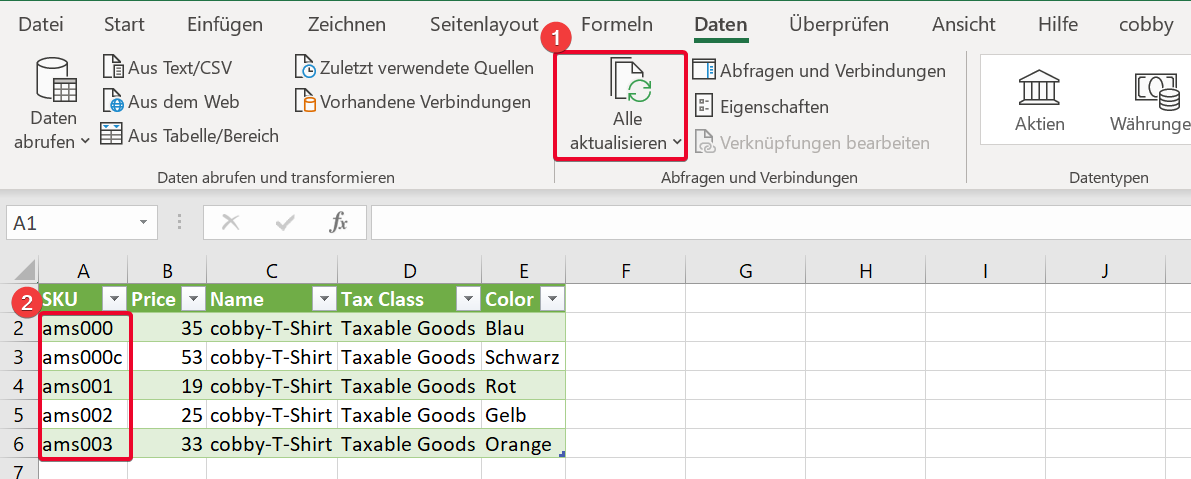
Step 6: Apply changes
If the supplier has made an adjustment, the change can easily be transferred to the PQ list.
To do this, proceed as follows:
Open the list PQ_price_import → Data → Refresh all
From the screenshot you can see that the SKU has changed.
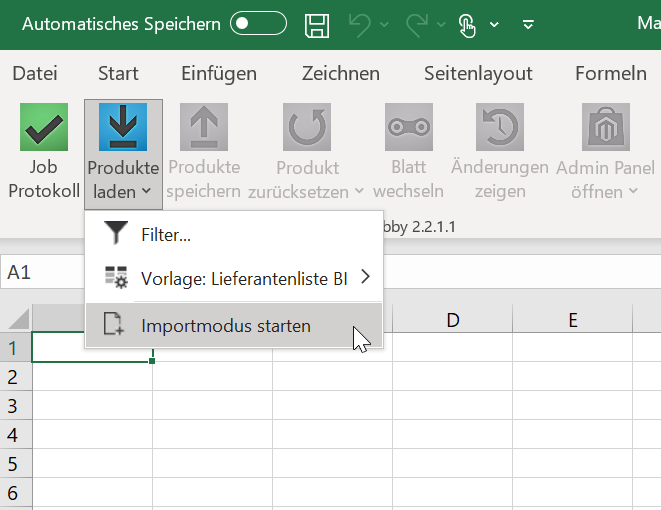
Step 7: Start import mode
After the columns have been sorted, the import in cobby can now take place.
To do this, please open Excel → cobby → Load products → Start import mode.
Attention: When creating a new product, in addition to the website and SKU, all mandatory fields must also be filled in and visible.

Step 8: Transfer values
Now copy your values from the newly created sheet, switch to your main sheet and paste the values there. Please do not copy "All Storeview" into it. The data must be entered manually.
Step 9: Save
Finally, click on "Save products". If you see a green tick, the import was successful.