Quick Start: Your First Product Edit (Shopware)
Welcome! In this quick start tutorial, you'll learn the basics of cobby for Shopware by completing your first product edit in just 10-15 minutes. By the end, you'll understand how to connect to your shop, load products, make changes, and save them back to your Shopware store.
See the Quick Start: Your First Product Edit (Magento) tutorial for Magento-specific instructions.
What You'll Learn
In this tutorial, we will:
- Open the cobby task pane in Excel and select your Shopware workspace.
- Navigate the cobby home screen.
- Load products using filter rules.
- Select which columns to display.
- View your product data in Excel.
- Edit product category assignments.
- Understand product status indicators.
- Save changes back to your Shopware shop.
Time to complete: About 10-15 minutes
Prerequisites: You should have cobby installed and connected to your Shopware shop.
Step 1: Open Excel and Select Your Workspace
First, let's access cobby and connect to your Shopware shop:
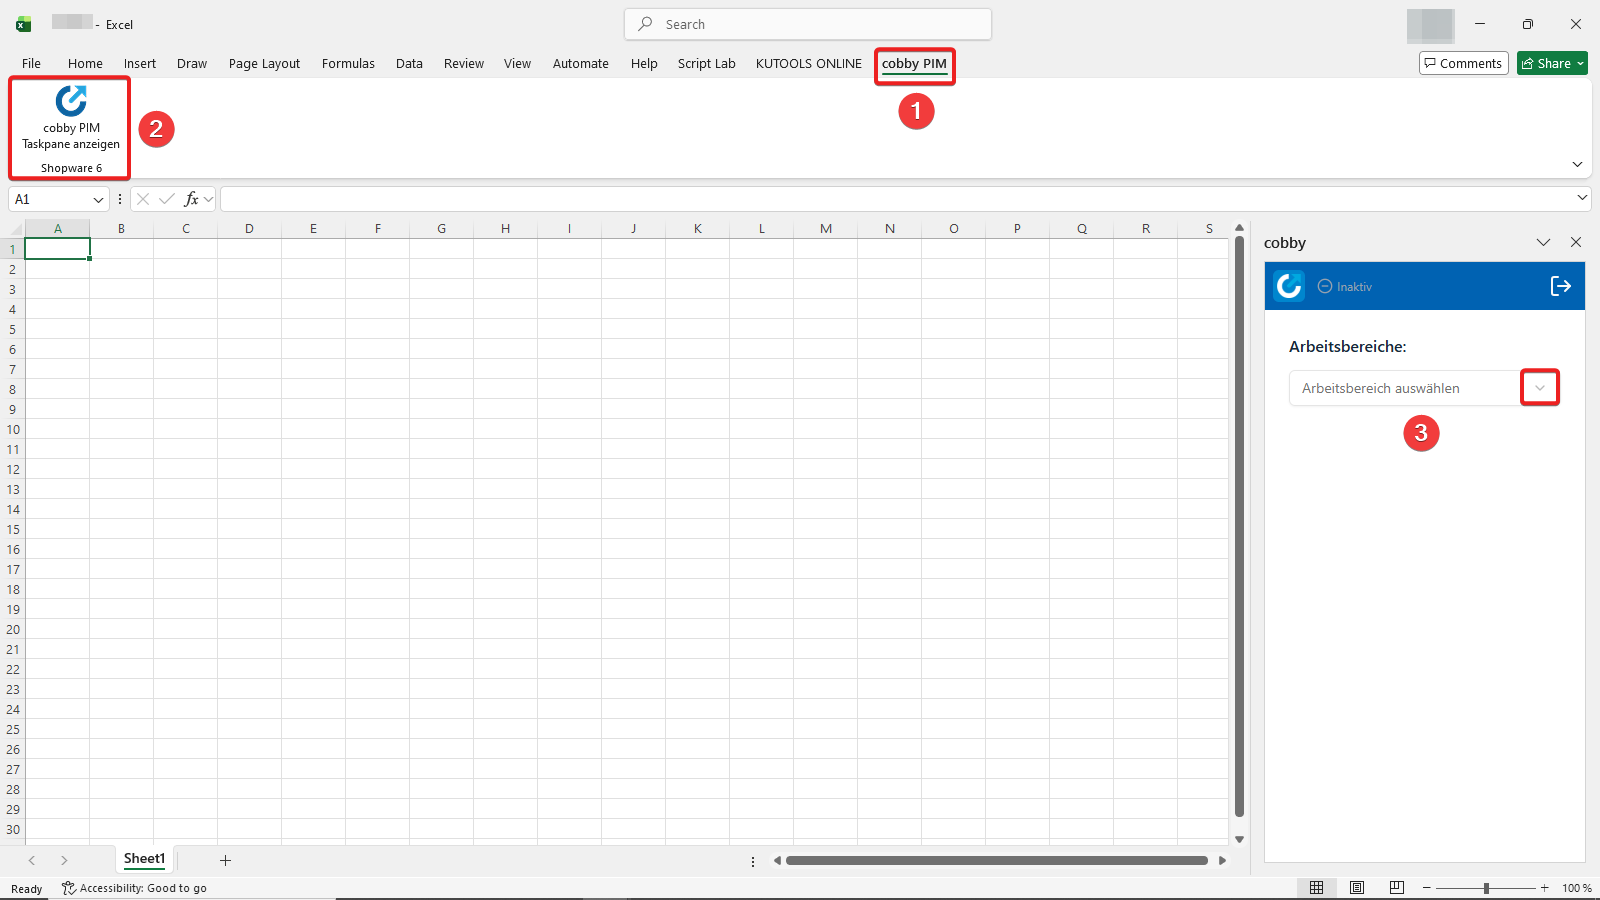
- Go to the cobby PIM tab in Excel's ribbon menu at the top.
- On the left side, click "Show cobby PIM Task Pane".
- In the task pane that opens on the right, select your workspace under "Select workspace" (you'll see your shop's URL).
What you'll see: After selecting your workspace, the cobby task pane opens to the "Home" tab.
What just happened? You've connected Excel to your Shopware shop through cobby. The task pane is now your control center for managing product data.
If you don't see the cobby PIM tab, cobby might not be installed correctly.
Step 2: Explore the Home Screen and Access Product Loading
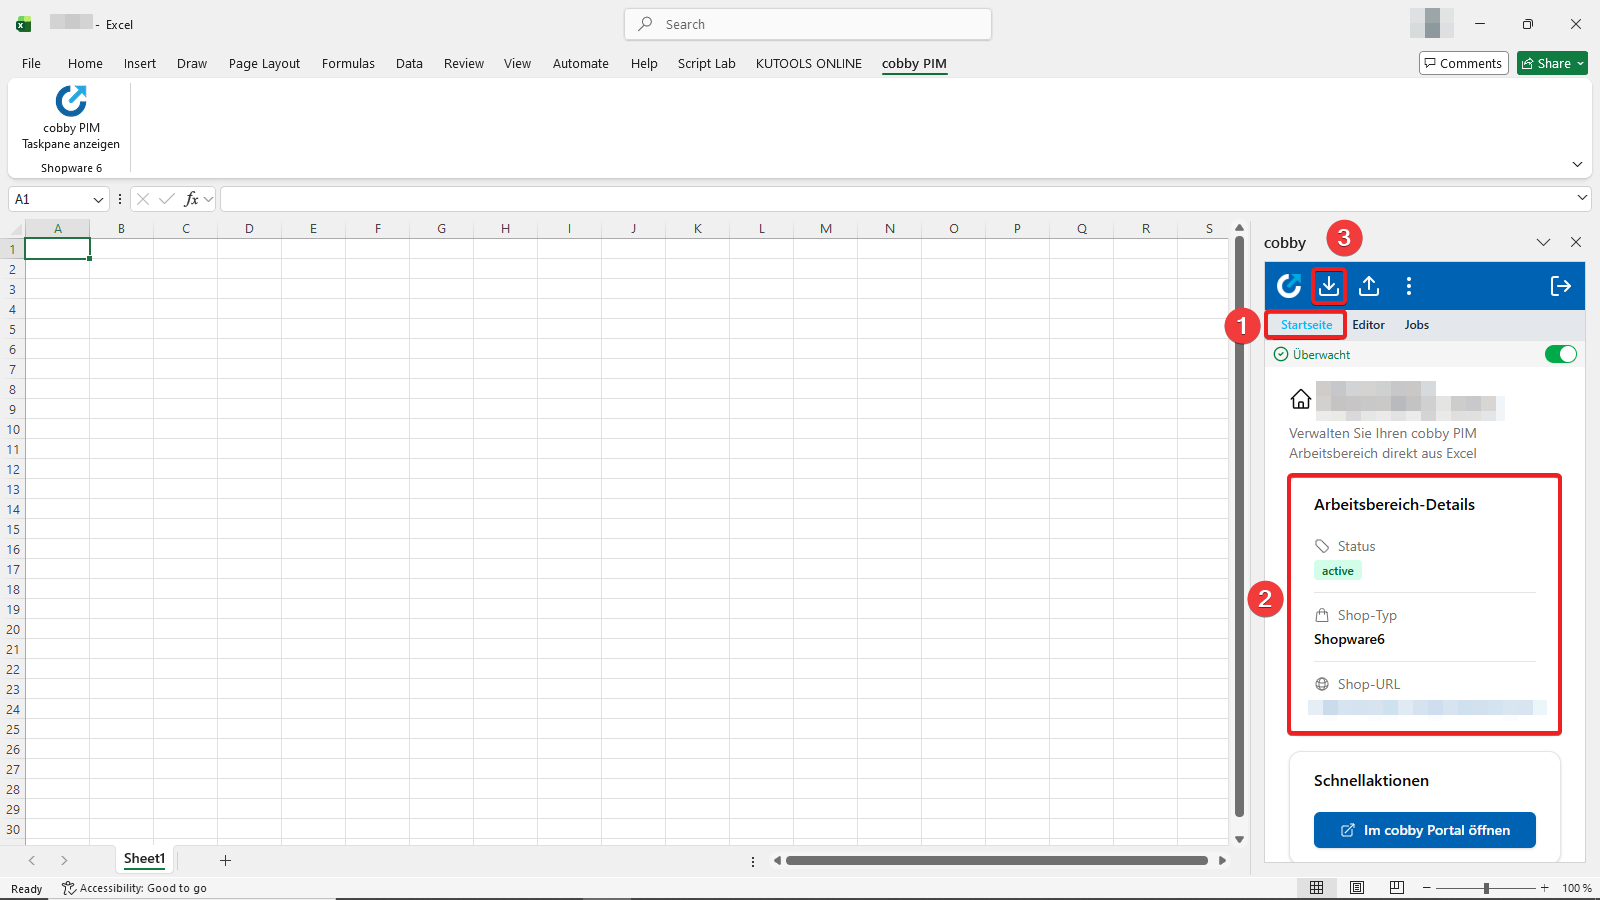
The Home tab shows your workspace information:
- You find the Home tab at the top of the cobby Taskpane.
- Workspace Details: You can see your shop status, shop type (Shopware), and shop URL. You can also access the cobby Portal directly from here.
- Load Products: Above the "Home" tab, click the "Load products" icon to start working with your products.
Why this matters: Before you can edit products, you need to load them into Excel. The product loading dialog gives you control over which products and attributes you want to work with.
Step 3: Configure Product Filters with Rules
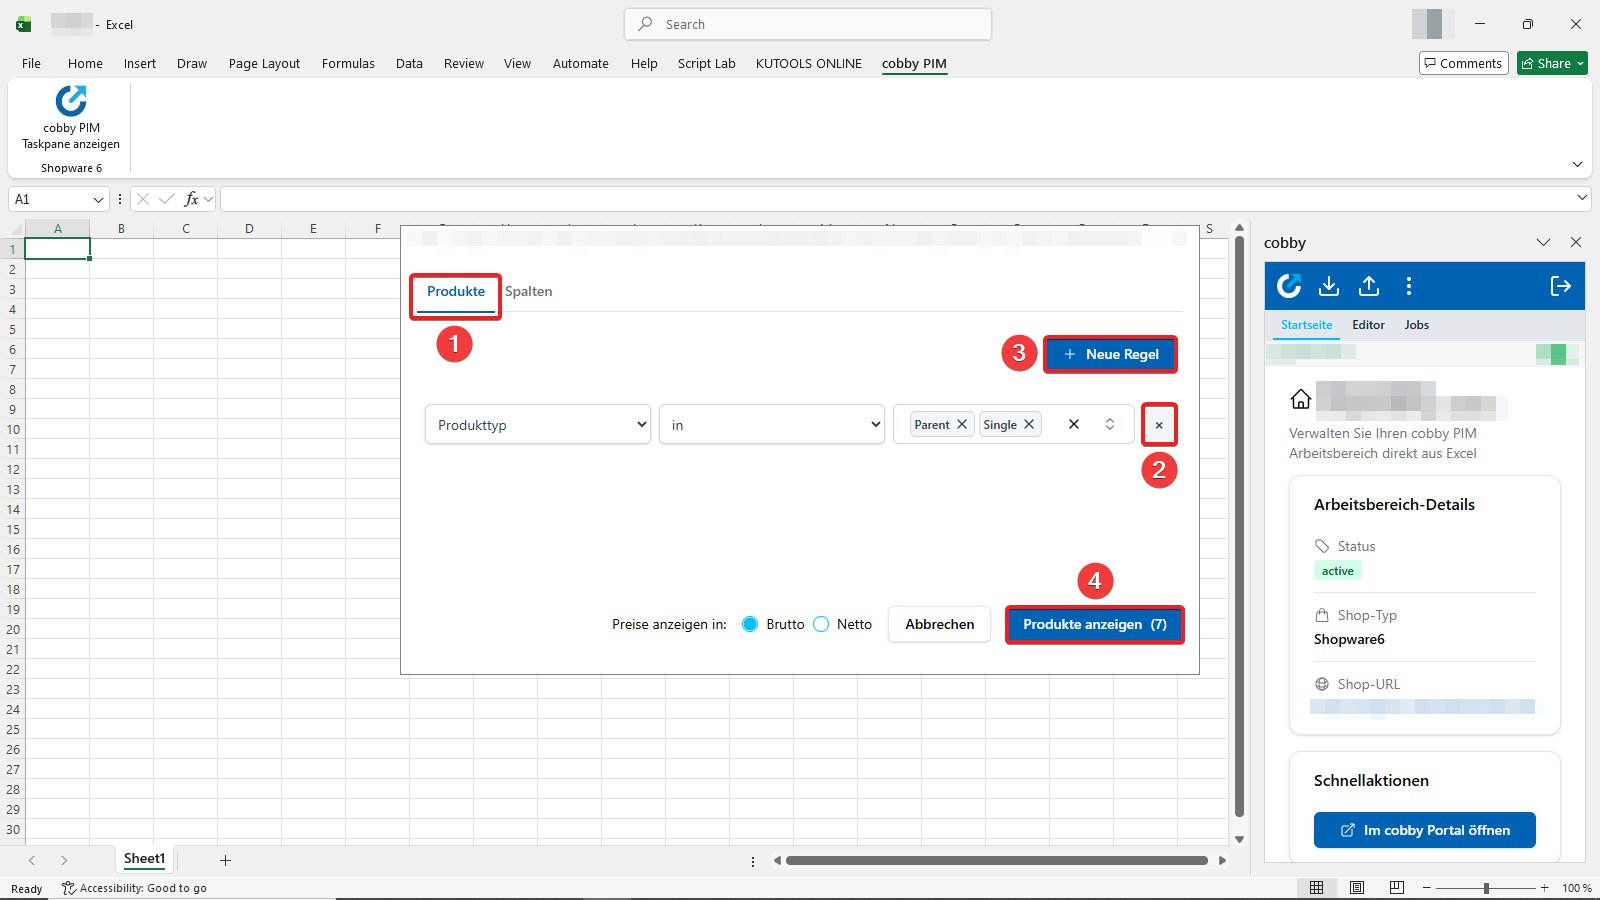
The product loading dialog opens with the "Products" tab active:
- View the filter rule: A default rule appears to help you load only specific products.
- Remove the rule: Click the X next to the rule to remove it (if no rule exists, all products will be loaded).
- Add new rules: Click "+ New Rule" to create additional filters if needed.
- Check the product count: Click "Show products" to load your products (the number in parentheses shows how many products match your filters).
What are rules? Rules let you pre-filter your products by category, price range, stock status, or other criteria. This is useful when you only want to work with a specific subset of products.
For this tutorial: We'll load all products, so remove any existing rules.
Step 4: Select Which Columns to Display
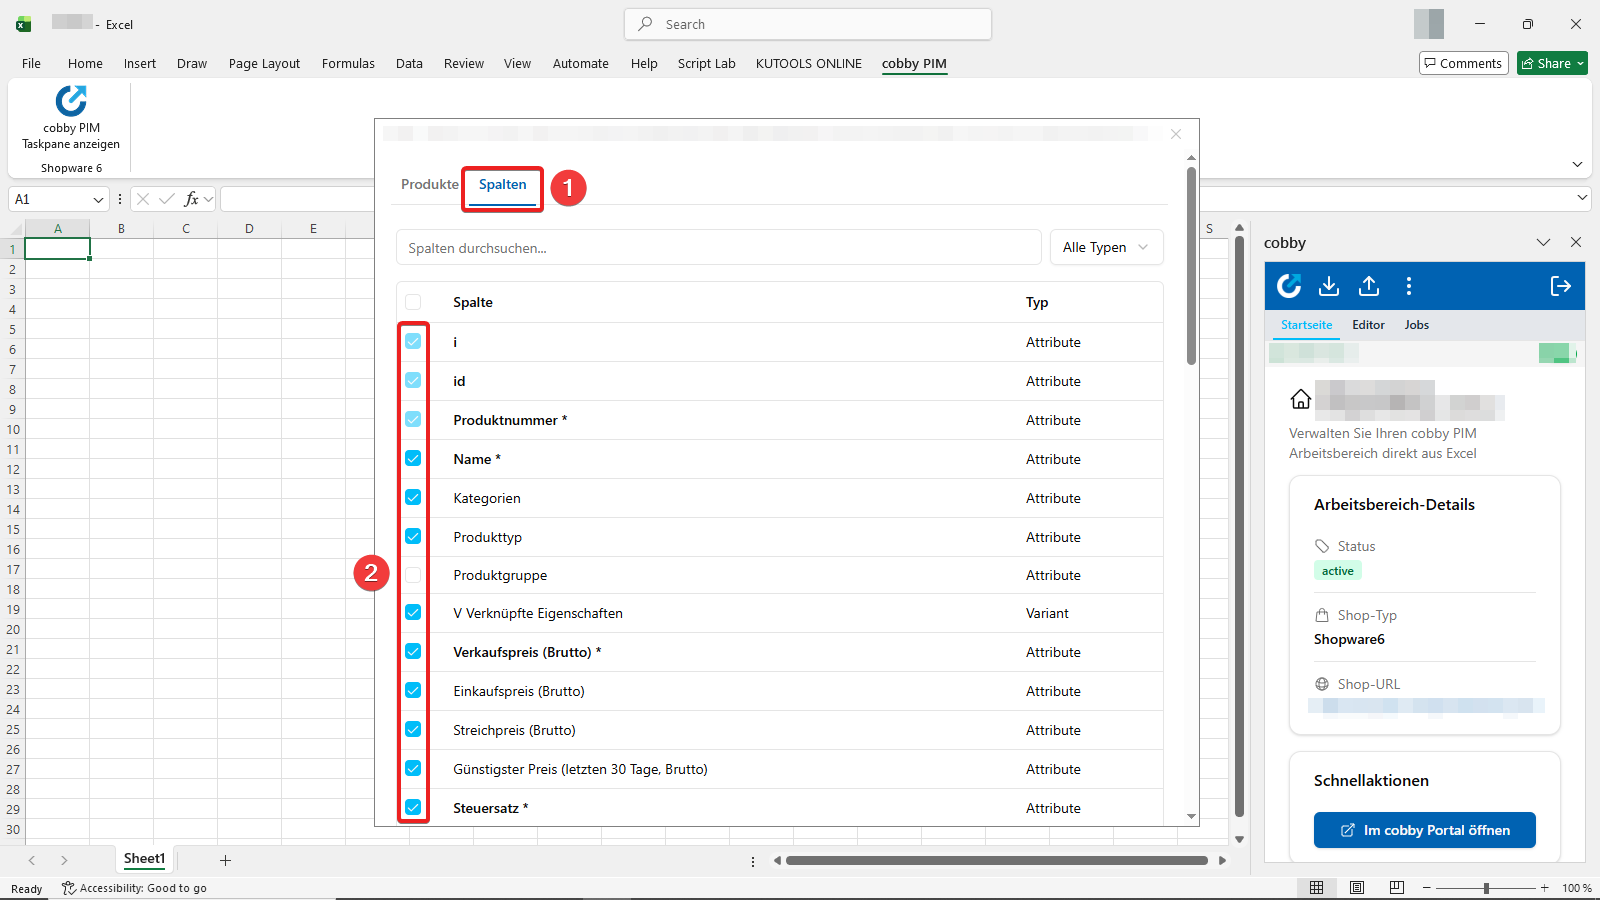
Before loading your products, you can choose which attributes (columns) to display in the "Columns" tab:
- Click the "Columns" tab in the product loading dialog.
- Select essential columns or hide unnecessary columns: For example, check boxes for ID, Name, Product Number, Sales Price, Tax Rate, and Categories. Uncheck the boxes for attributes you don't need right now. Columns marked with an asterisk (*) are required fields.
- Scroll to the bottom and click "Show products" when ready.
Why select columns? Loading only the columns you need makes your spreadsheet cleaner and faster to work with. You can always load different columns later for other tasks.
What you'll see: Excel begins loading your products with only the selected columns.
Step 5: View Your Product Data
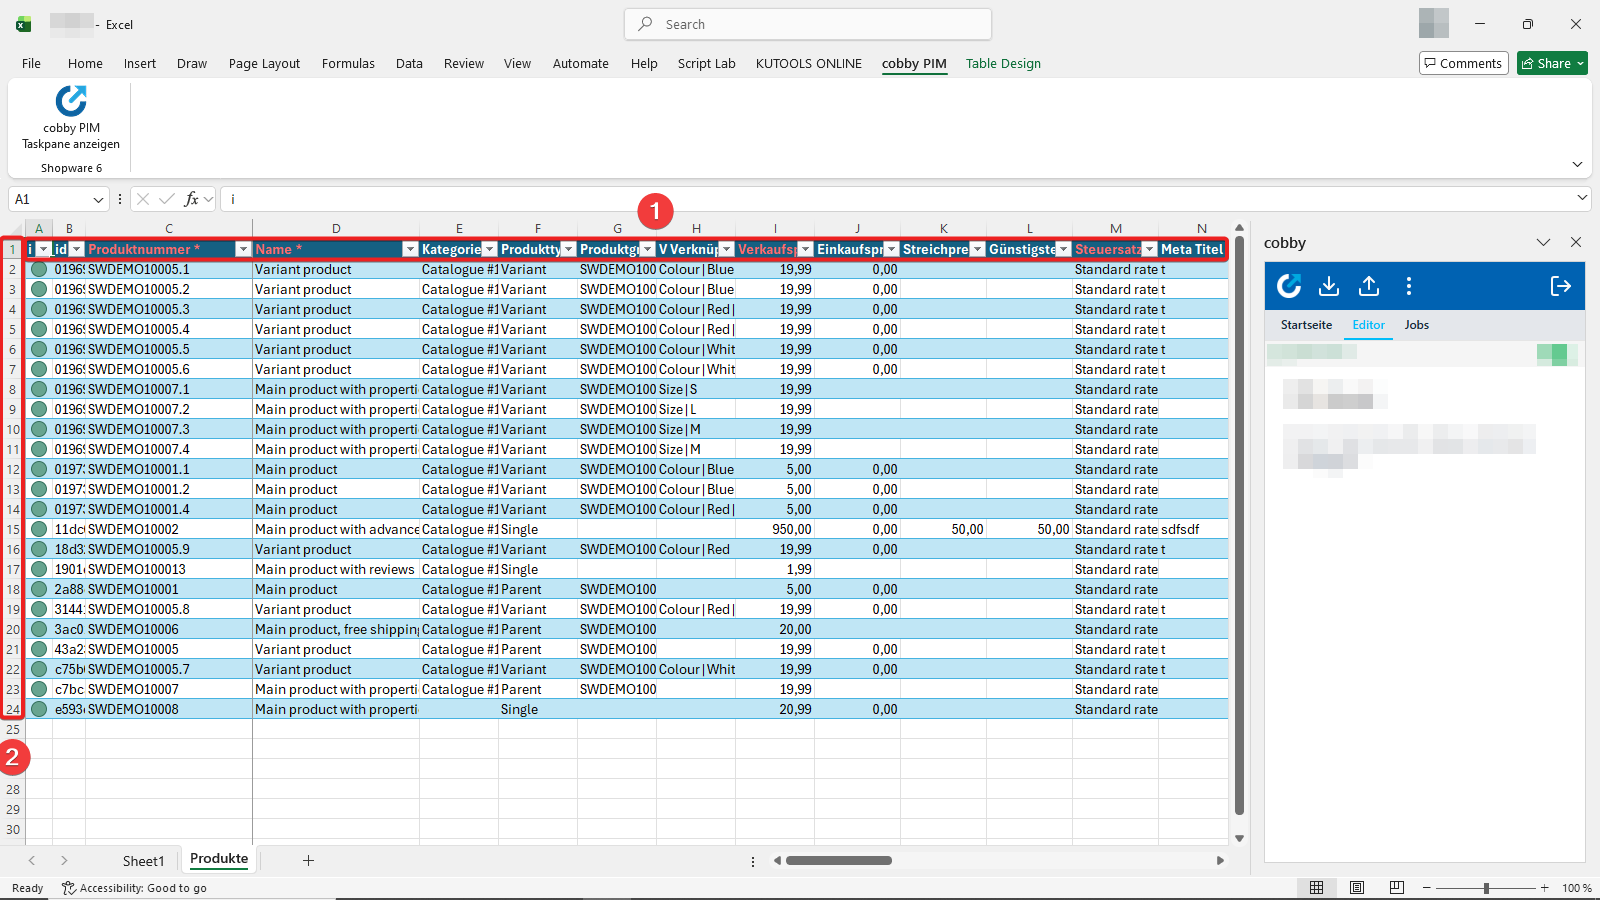
After a few moments, your products appear in Excel:
- Product layout: The columns represent the different product attributes. Columns marked in red with an asterisk (such as Name *) are required fields.
- Row structure: Each row represents one complete product with all its attribute data (in our example, 24 products).
Understanding the spreadsheet:
- Each row = One product: Every product is listed in its own row.
- Each column = One attribute: Product attributes (Name, Product Number, Price, Categories, etc.) appear as separate columns.
Product Status Column: Notice the leftmost column shows colored status indicators. Right now, all products show green, which means they're synchronized with your shop. We'll learn more about this status column when we make changes in the next steps.
Step 6: Edit a Product's Category Assignment

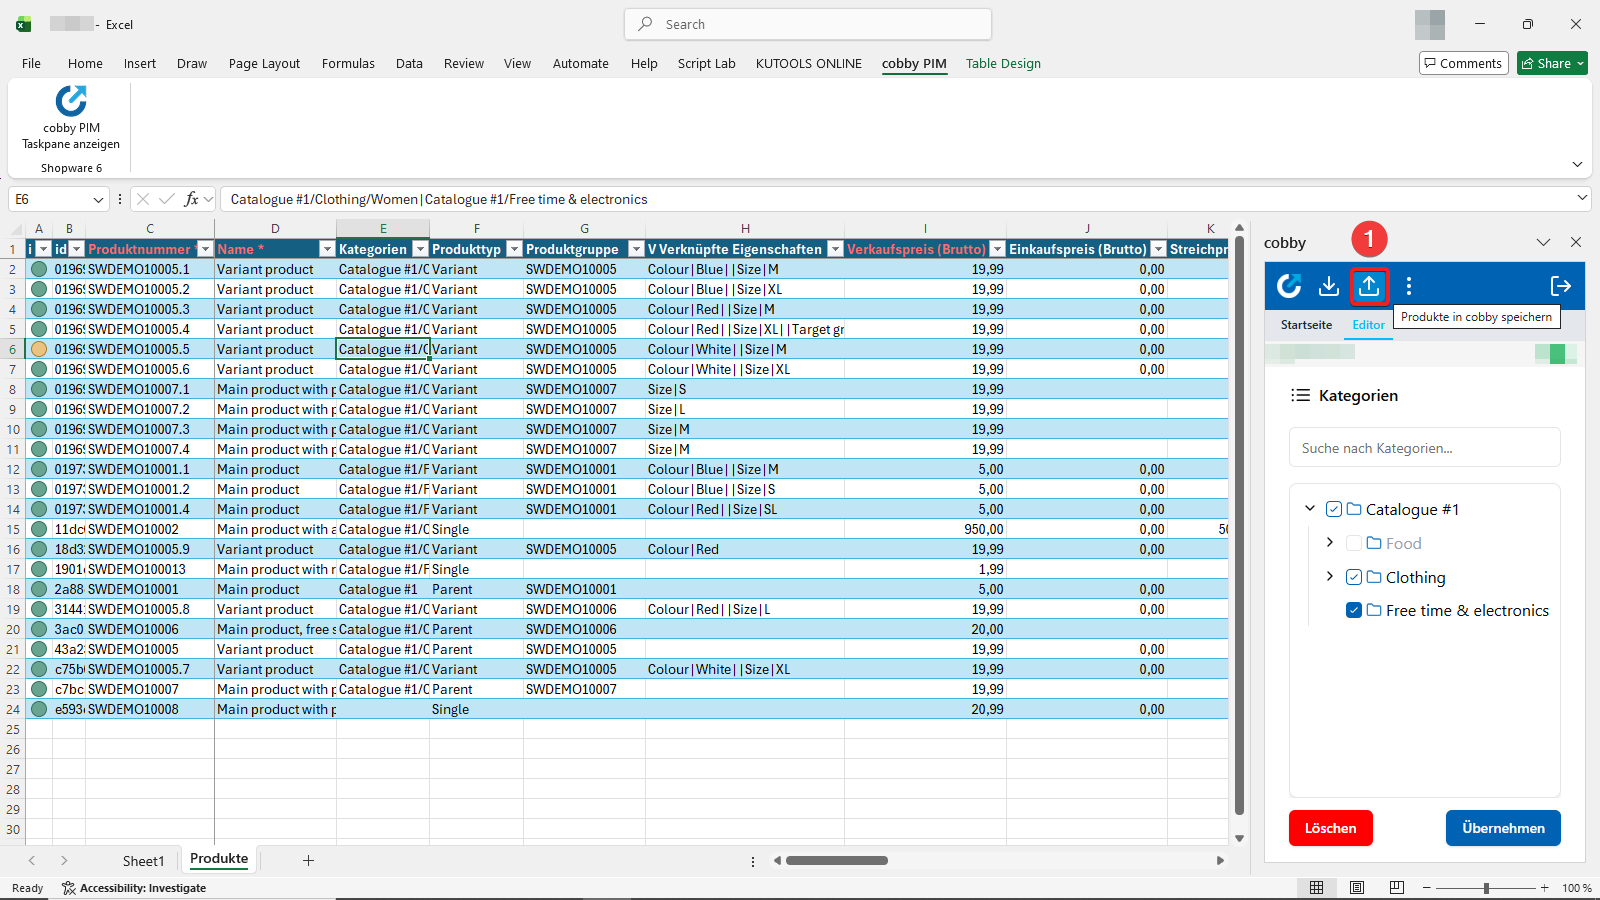
Now let's make your first edit by changing a product's category assignment:
- Click on any cell in the "Categories" column for the product you want to edit.
- The task pane updates: On the right, the cobby task pane now shows category options for this product. Click the checkbox next to a category to add or remove the product from that category.
- Apply changes: Click the "Apply" button to confirm your changes.
- Notice the status change: The product status (leftmost column) turns yellow.
Example: In our tutorial, we're changing a product's category assignment to include it in multiple categories.
Step 7: Understand Product Status Indicators
You just saw the product status change from green to yellow. Let's understand what this means:
- 🟢 Green status: The product in Excel matches your Shopware shop - everything is synchronized.
- 🟡 Yellow status: You've made changes in Excel that haven't been saved to your shop yet (this is what you see now!).
- 🔴 Red status: Someone else changed this product in the shop since you loaded it.
Visual tracking: This color system helps you see at a glance which products have pending changes.
Why this matters: The status indicator is your guide throughout the cobby workflow. It tells you when you have unsaved work and helps prevent conflicts when working with team members. Always check the status before making changes and after saving to confirm everything synchronized correctly.
Now that your changes are marked as unsaved (yellow), let's save them to make them live in your shop.
Step 8: Save Your Changes to Shopware
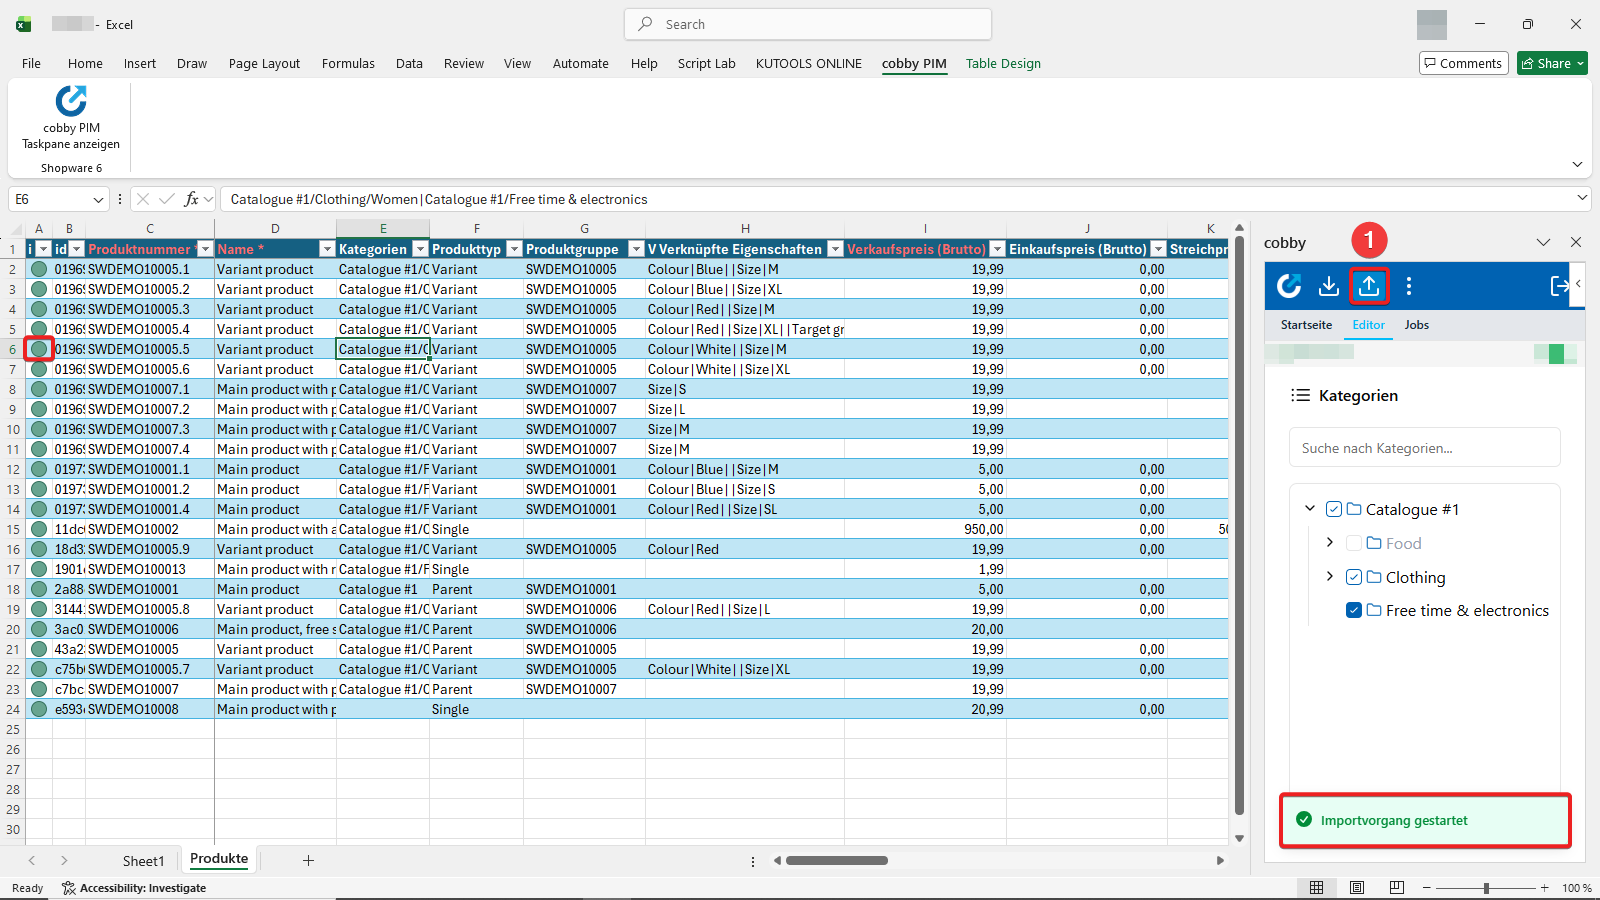
Time to make your changes live in your Shopware shop:
- Click the upload button (save icon) next to the "Load products" button at the top of the task pane.
What you'll see:
- cobby synchronizes your changes in real-time with your Shopware shop. This may take a moment, as the data is being transferred to Shopware.
- The Product Status changes from yellow back to green.
- Your changes are then live in your shop.
What just happened behind the scenes:
- cobby sent your category assignment changes to your Shopware shop.
- Shopware updated the product data.
- cobby confirmed the changes were successful.
- The product status returned to green (synchronized).
Your product data is now up to date everywhere. The changes are immediately visible in your Shopware shop, and the product is now assigned to the categories you selected.
What You've Accomplished
Congratulations! You've completed your first product edit with cobby for Shopware. You now understand:
- How to connect Excel to your Shopware workspace
- How to load products with filters and column selection
- How the product grid is organized (rows = products, columns = attributes)
- How to edit product data using the task pane
- What product status indicators mean and how to use them
- How to save changes back to your Shopware shop
You've mastered the core cobby workflow: Load → Edit → Save
Next Steps
Now that you understand the basics, continue your learning journey:
Explore Key Features
- Working with categories - Understand how category management works in cobby
- Presets - Complete reference for creating custom column views for different workflows
- Product status and job history - Deep dive into status indicators and tracking changes
Master Common Tasks
- Managing product images - Upload and organize product photos
- Bulk price updates - Change prices for multiple products at once
- Using Excel formulas - Automate calculations and data transformations
Try making different edits to get comfortable with the workflow: change product names, update prices, or modify descriptions. The more you practice, the faster you'll become!