How to Match Categories Between Systems
Goal: Create a category matching table to map old categories to new categories when migrating between stores or updating category structures.
Prerequisites
- Excel with cobby installed
- Access to both old and new category structures
- Source data containing categories to be matched
Steps
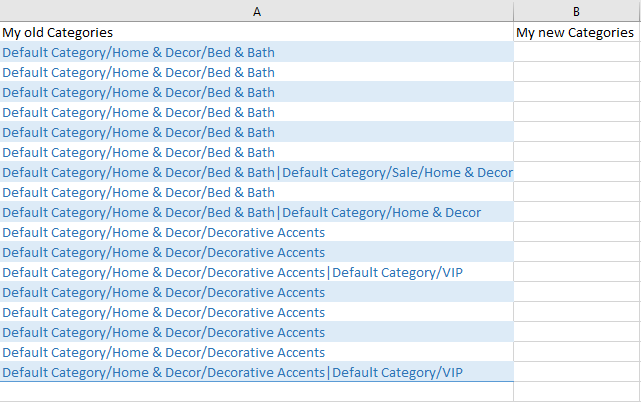
1. Prepare Your Category List
- Open your source data and locate the categories you want to match
- Select and copy all categories
- Paste them into a new empty Excel sheet
- Add two column headers:
- First column: Name for old categories (e.g., "Old Categories")
- Second column: Name for new categories (e.g., "New Categories")
2. Convert to Excel Table
- Select all rows and columns for your category data

- Navigate to Home tab and click Format as Table
- Choose a table design
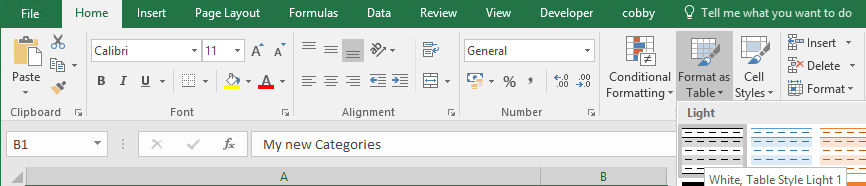
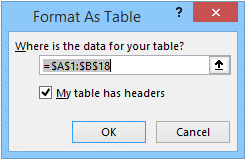
- In the dialog box that appears, verify the range and click OK
3. Remove Duplicate Categories
- Navigate to Data tab and click Remove Duplicates
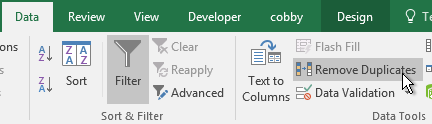
- In the Remove Duplicates window, uncheck the empty second category column
- Click OK
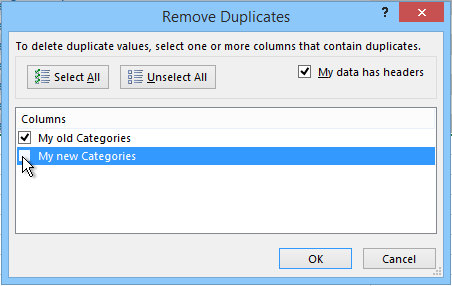
- A message box will confirm the number of duplicates removed

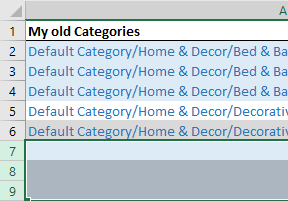
4. Clean Up Empty Rows
If Excel leaves empty rows in the table:
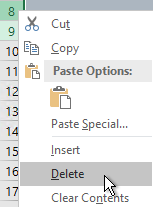
- Click Data and then click the Sort A-Z button to group empty rows together

- Select all empty rows
- Right-click on the row number and click Delete
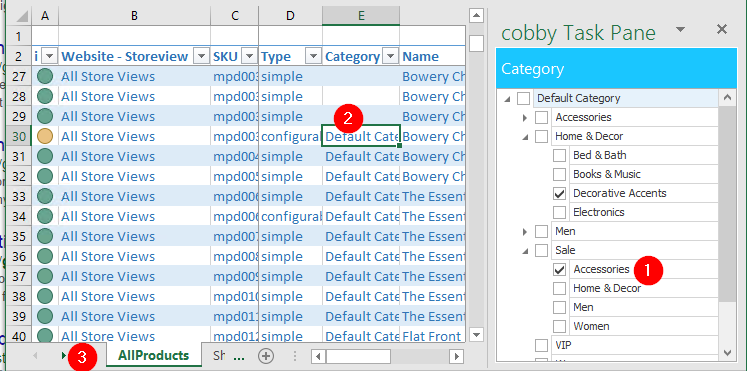
5. Load Products in cobby
- In the same Excel workbook, click Load products to load your store products

- Select a product from the store view that matches your category structure
- If unsure, select a product from "All StoreViews"
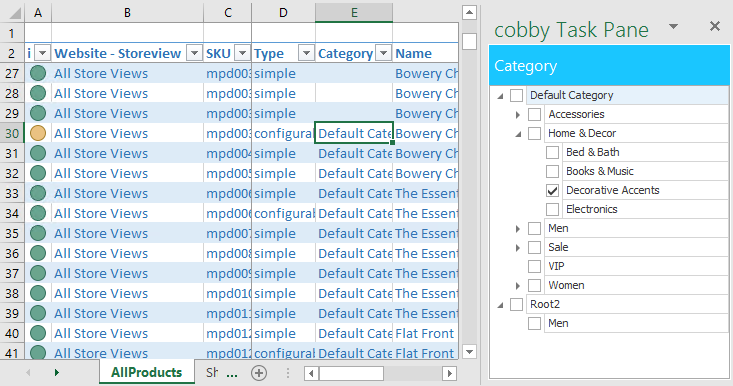
6. Assign New Categories
- Click on the Images column cell for your selected product
- The cobby Task Pane will open on the right side
-
For each row in your matching table:
- Select the matching categories in the Task Pane
- Copy the category cell
- Navigate to your matching table
- Paste into the "New Categories" column
- Return to the product and select the category cell again
- Delete the cell content
- Repeat until all rows are filled
-
After completing all matches, select the category cell again
-
Click Reset Product to restore the original state

7. Use the Matching Table with Formulas
Apply the matching table using the INDEX and MATCH formula:
=INDEX(CategoryMatchingTable[New Categories]; MATCH([Old Category]; CategoryMatchingTable[Old Categories]; 0))
Replace:
CategoryMatchingTablewith your table name[New Categories]with your new category column name[Old Categories]with your old category column name[Old Category]with the cell reference containing the old category
Troubleshooting
Empty rows remain after removing duplicates
Manually select and delete empty rows using the steps in section 4
Categories not appearing in Task Pane
- Verify you selected a product from the correct store view
- Try selecting a product from "All StoreViews"
Formula returns error
- Verify table name matches your Excel table name
- Check that column names are spelled correctly
- Ensure the old category value exists in your matching table
Next Steps
Once your matching table is complete, you can:
- Apply the formula to all products requiring category updates
- Use the matching table across multiple workbooks
- Update the table as your category structure evolves