How to Troubleshoot cobby Installation and Setup
This guide helps you resolve common issues during cobby installation, configuration, and initial setup. Use this guide to verify system requirements, fix installation errors, and resolve common setup problems.
Verify System Requirements
Before installing cobby, ensure your system meets these requirements:
Windows and Excel
cobby is fully integrated into Microsoft Excel. Therefore, a local Excel installation is always required for use.
Windows
- Windows 7 with Service Pack 1 (32-bit and 64-bit)
- Windows 8.1 and later
- Server 2008 R2 Service Pack 1 (32-bit and 64-bit)
- Windows Server 2012 and later (32-bit and 64-bit)
Mac or Linux
cobby requires Windows and Excel from version 2016 onwards.
Using cobby on a non-Windows system is currently only possible via a virtual machine:
- Mac: Parallels or VMware Fusion
- Linux: VirtualBox
We are already working on a native Mac version. If you are interested, we would be happy to add you to our private testing list – simply contact us.
Excel
- Excel 2016 or Office 365 / 64-bit and later
- Excel for Mac and OpenOffice are not supported
Magento Versions
- Magento 1:
- Community Edition from 1.6
- Enterprise Edition from 1.12
- Magento 2: Community Edition and Enterprise Edition from 2.3
How to Check Your Excel Version
- Open Excel.
- Go to File → Account → Product Information Microsoft Office.
- Click Info about Excel for detailed version information.
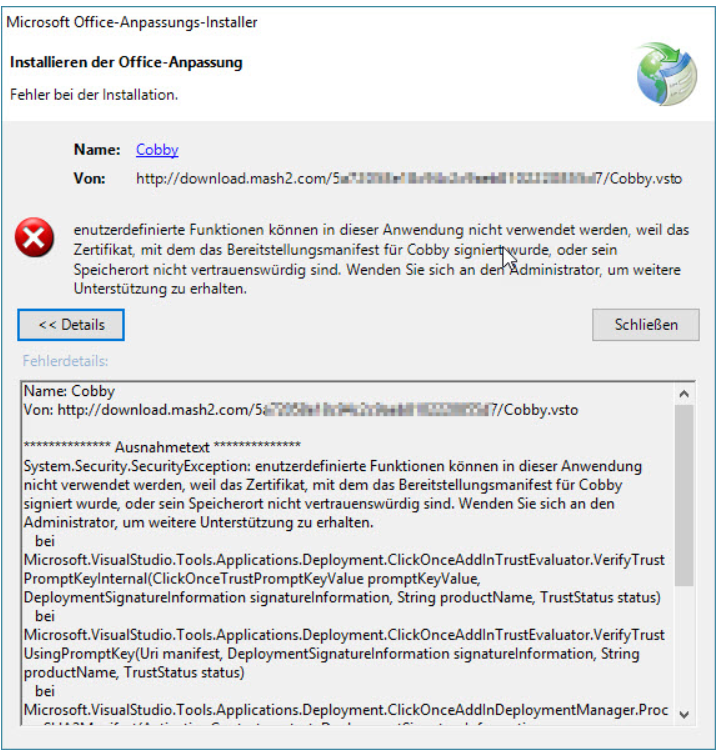
Fix Installation Error Messages
If you receive an error message during installation that prevents the add-in from being installed:
Step 1: Install Windows and Office Updates
The cobby installer requires the latest Windows and Office files to run successfully.
- Open your Control Panel.
- Click on System and Security.
- Select Windows Update.
- Install all pending updates.
- Restart your computer if required.
- Open Excel and check for Office updates (File > Account > Update Options).
- Install any pending Office updates.
- Try running the cobby installer again.
Step 2: Install Security Certificate (If Step 1 Fails)
If the installation still fails after updating, install the cobby security certificate manually.
-
Right-click on the cobby installation file.
-
Select Properties.
-
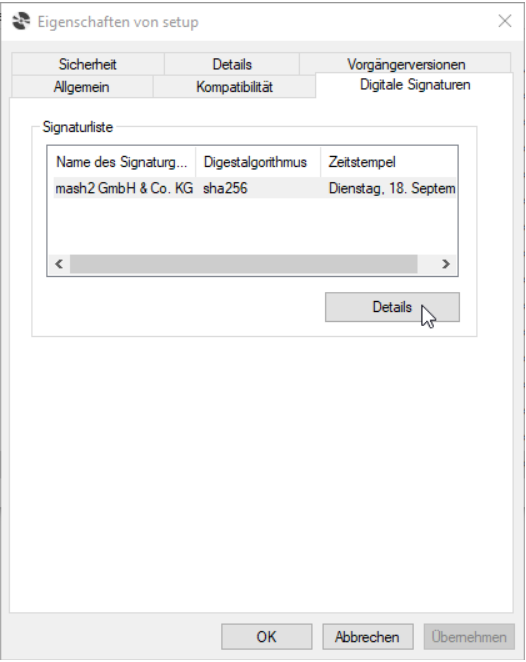
Go to the Digital Signatures tab.
-
Select the entry "mash2 GmbH & Co. KG".
-
Click Details.
-
In the "Digital signature details" window, click View certificate.
-
In the "Certificate" window, click Install Certificate.
-
Follow the Certificate Import Wizard.
-
When asked for the certificate store, select Place all certificates in the following store.
-
Click Browse and select Trusted Publishers.
-
Click OK, then Next, then Finish.
-
Try running the cobby installer again.
Additional Installation Troubleshooting
Installation still fails after following all steps:
- Verify you have administrator rights on your computer.
- Check if antivirus software is blocking the installation (temporarily disable and retry).
- Ensure you downloaded the installer from the official cobby website.
- Contact cobby support at info@cobby.io with the exact error message.
Error message mentions missing files:
- Run Windows Update again and ensure all updates are installed.
- Restart your computer and try the installation immediately after startup.
- Check that your Excel installation is not corrupted (repair Office through Control Panel if needed).
Fix "Sorry, we couldn't find..." Error After Reinstall
If you see an error message saying "Sorry, we couldn't find..." after reinstalling cobby:
- Click OK to confirm the error message.
- Close Excel completely.
- Reopen Excel.
- cobby should now work normally.
This error occurs temporarily after reinstalling and resolves itself after restarting Excel.
Uninstall cobby
To completely remove cobby from your system:
- Open Windows Settings (Windows key + I).
- Go to Apps → Apps and Features.
- Find cobby in the list of installed applications.
- Click on cobby and select Uninstall.
- Follow the uninstallation wizard.
In cobby 2.0, remember to unassign the license from the user in the cobby customer portal if you want to assign it to a different user or computer.
Launch Excel Without cobby Add-in
If you want to start Excel without loading the cobby add-in for faster startup:
- Open File Explorer.
- Search for Excel in the Windows search.
- Right-click on Excel Application.
- Select Send to → Desktop (create shortcut).
- Right-click the newly created desktop shortcut.
- Select Properties.
- In the Target field, add
/sat the very end (note the space before /s).- Example:
"C:\Program Files\Microsoft Office\root\Office16\EXCEL.EXE" /s
- Example:
- Click OK.
- Use this shortcut when you want to launch Excel without cobby.
Use this shortcut when you need to work in Excel without cobby and want faster startup times. Your regular Excel shortcuts will still load cobby normally.
Configure Magento API URLs
cobby uses different API URLs depending on your version:
Magento 1
- cobby versions after 1.40: Either:
Protocol://ShopURL/index.php/api/cobby/json, orProtocol://ShopURL/api/cobby/json
Magento 2
- API URL:
Protocol://ShopURL/index.php/rest/
Ensure that /index.php/rest/ is excluded from URL rewrites in your Magento 2 configuration, otherwise the cobby connection will fail.
Fix "Integration not secure" Message (Magento 2)
When setting up Magento 2 integration, you may see an "Integration not secure" message. This is normal behavior and requires no action.
This message appears because cobby uses manual key entry rather than automatic integration for security reasons. The integration is secure despite this message.
For more information, see the Adobe Developer article on integrations.
Configure .htaccess for cobby IP Addresses
If your shop uses .htaccess authentication, you need to whitelist cobby's IP addresses or exclude API routes.
Option 1: Whitelist cobby IP Addresses
Add these IP addresses to your .htaccess whitelist:
78.46.90.150138.201.83.227157.90.208.180157.90.208.174
Option 2: Exclude API Routes
Configure your .htaccess to exclude API routes from authentication:
- Magento 1: Exclude
/api/cobby/ - Magento 2: Exclude
/rest/
If you want to use image preview features in cobby, you must also exclude the /media directory from .htaccess authentication.
Change Your Shop Domain
If you change your shop's domain name:
In Magento Backend
- Log into Magento admin panel.
- Go to Stores → Configuration → Web → Base URL.
- Update the base URL to your new domain.
- Save the configuration.
- Clear the Magento cache.
In cobby Customer Portal
- Log into the cobby customer portal at https://app.cobby.io.
- Update your shop URL in the connection settings.
- Save the changes.
Both locations must be updated for cobby to continue working properly.
Flush Magento Cache
After making configuration changes or if you experience unexpected behavior, flush the Magento cache:
- Log into Magento admin panel (requires admin rights).
- Go to System → Cache Management.
- Click Flush Magento Cache.
Configure Varnish Cache
If your Magento installation uses Varnish cache:
- cobby can automatically flush Varnish cache when making changes.
- You can enable or disable automatic flushing in the Magento backend.
- Recommendation: For large catalogs, consider deactivating automatic flushing to improve performance.
Automatic Varnish cache flushing ensures customers see updated data immediately but can impact performance with large catalogs. Evaluate based on your update frequency and catalog size.