Install cobby for Magento 1
This guide shows you how to install and configure cobby for your Magento 1 shop.
Prerequisites
- cobby account (register at app.cobby.io)
- Admin access to your Magento 1 backend
- FTP/SFTP access to your Magento server
- Your Magento admin password
- Microsoft Excel installed on your computer
It is strongly recommended to make a backup of your server files and database before installing this extension. We recommend testing the installation on a staging server first.
Watch our step-by-step video guide for the complete setup process:
Step 1: Create Your Workspace in the cobby Portal
-
Log in to the cobby portal at app.cobby.io.
-
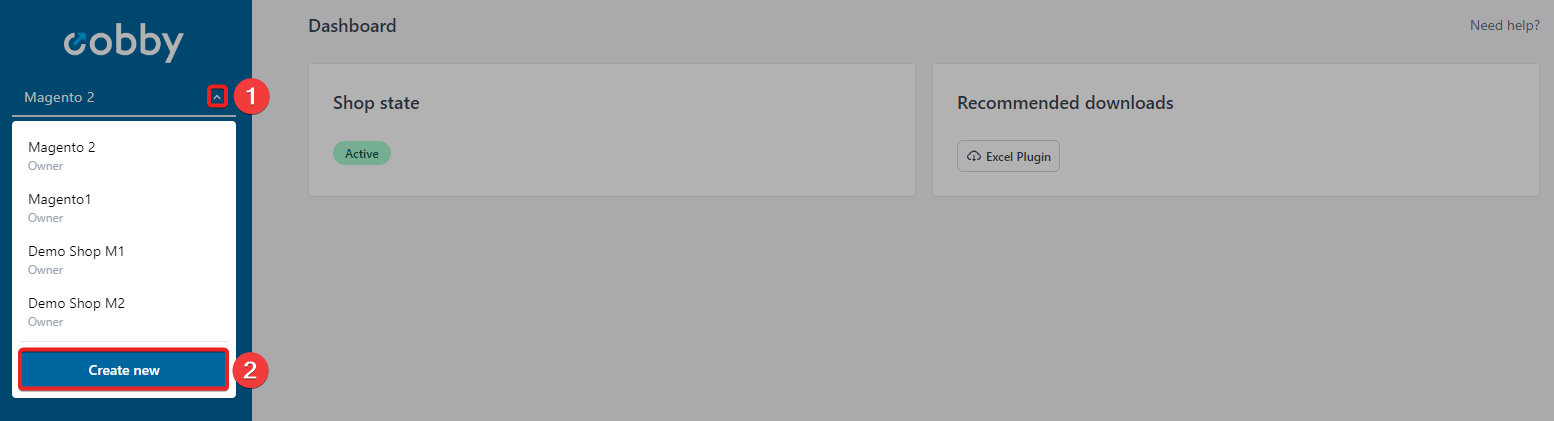
Click on the little arrow on the left to view all workspaces.
-
Click on Create new to add a new workspace.
-
Give your workspace a meaningful name (e.g., "My Magento 1 Shop").

-
Click Create.
Each workspace can only be connected to one shop and one license. If you have multiple shops (e.g., staging and production) or are migrating from Magento 1 to Magento 2, you'll need to create separate workspaces for each.
Step 2: Select Your Shop System and Download the Extension
-
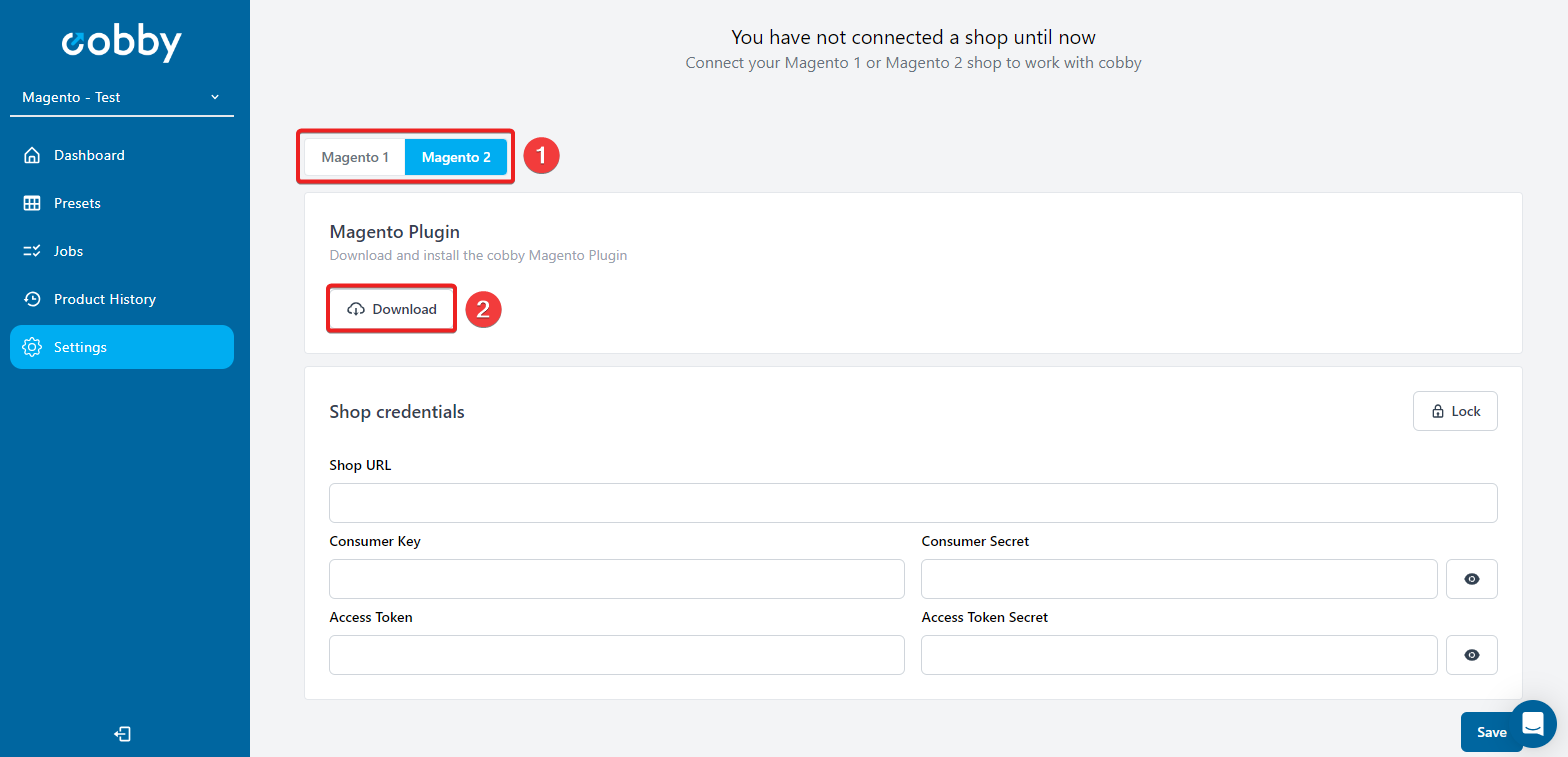
Select Magento Version 1 as your shop system.
-
Click the download button to download the cobby extension for Magento 1.
Step 3: Prepare Your Magento Installation
-
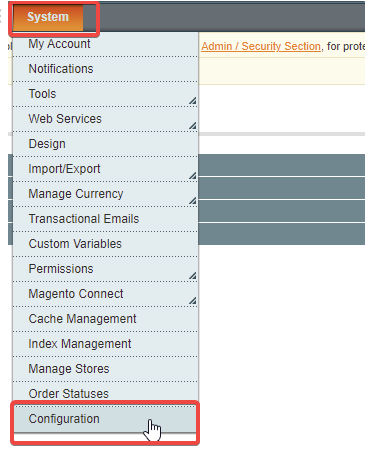
Log in to your Magento Admin Panel.
-
Go to System → Tools → Compilation.
-
If the compiler is enabled, disable it (you'll re-enable it later).
-
Go to System → Cache Management.
-
Make sure the cache is enabled.
Having the cache enabled during installation helps ensure the extension installs correctly.
Step 4: Upload the Extension Files to Your Server
-
Unzip the downloaded cobby extension archive on your computer.
-
Connect to your Magento server using your FTP/SFTP client (we recommend FileZilla)
-
Navigate to your Magento root directory (the folder containing
app,downloader,errors, etc.). -
Upload the contents of the
appdirectory from the ZIP file to your server'sappdirectory.- Important: Skip the
app/etcdirectory for now - we'll upload it in the next step
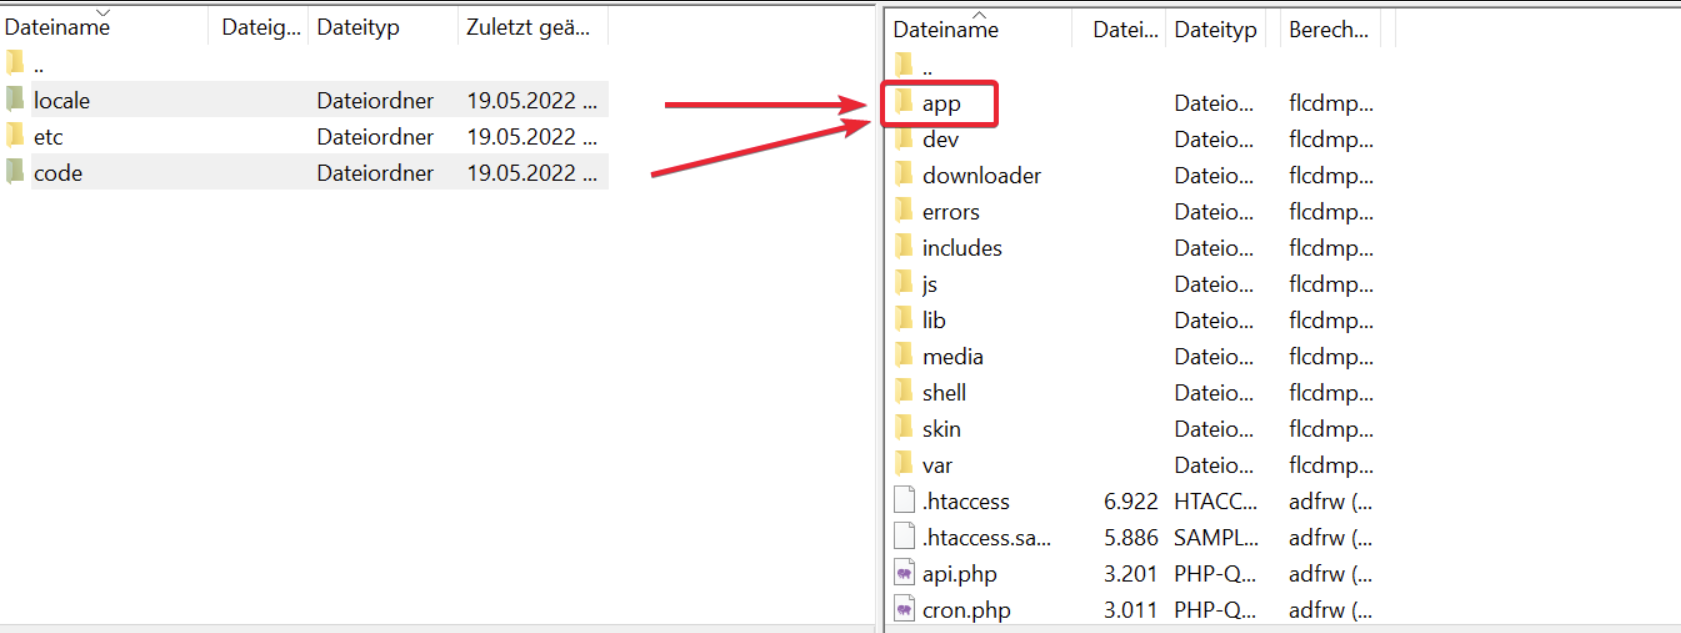
- Important: Skip the
-
After all other files are uploaded, now upload the contents of
app/etcfrom the ZIP file to your server'sapp/etcdirectory.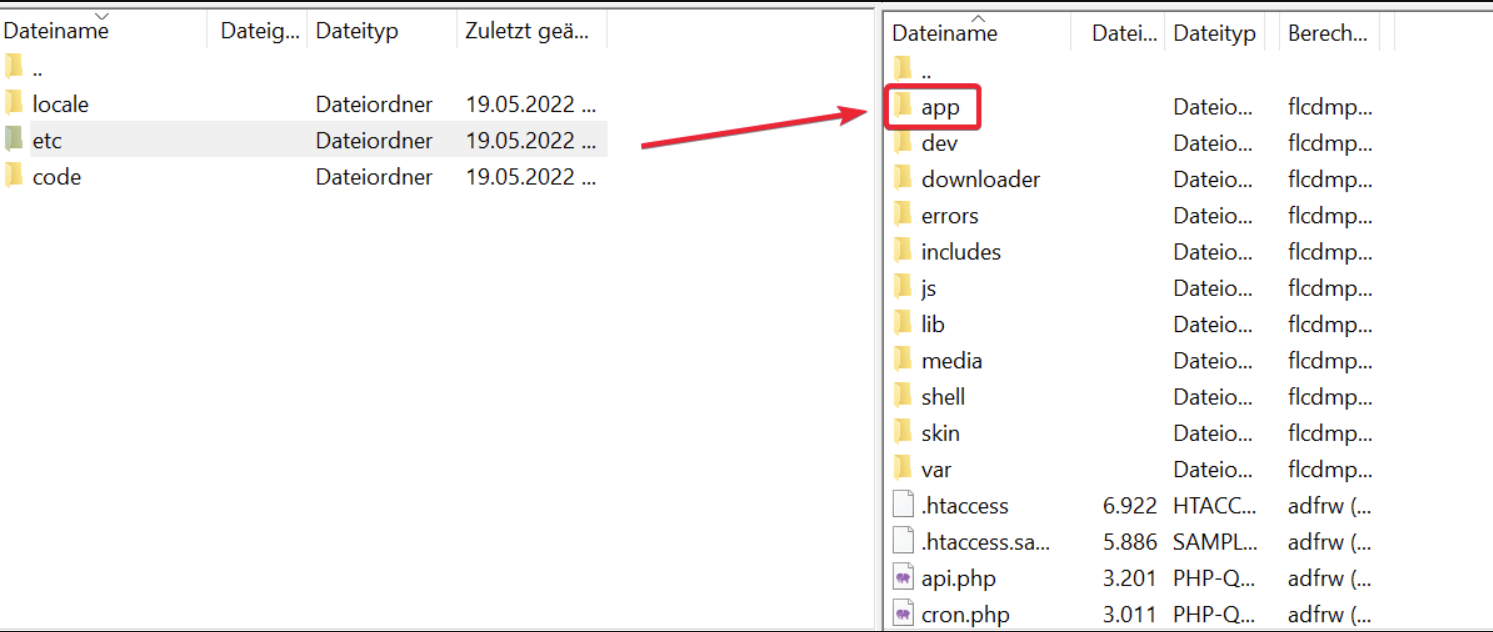
Uploading the app/etc directory last greatly reduces the chance of SQL scripts not running correctly during installation.
Step 5: Activate the Extension in Magento
-
Log out of the Magento Admin Panel.
-
Log back in to the Magento Admin Panel.
warningThis logout/login step is essential to prevent "404 Access Denied" errors.
-
Go to System → Cache Management.
-
Disable all caches by unchecking all cache types.
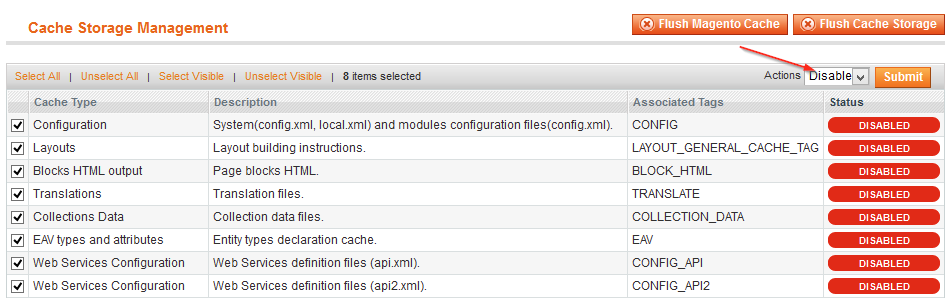
-
Click Flush Magento Cache to empty the cache completely.
-
Open your shop's frontend in a browser (visit your shop's public URL).
Opening the frontend ensures that all database updates are executed properly.
Step 6: Complete the Installation
-
If you use the Magento compiler, go back to System → Tools → Compilation.
-
Run the recompilation process.
warningSkipping recompilation can cause fatal errors like "Call to a member function toOptionArray() on a non-object"
-
Go back to System → Cache Management.
-
Re-enable all caches.
-
Refresh the cache.
-
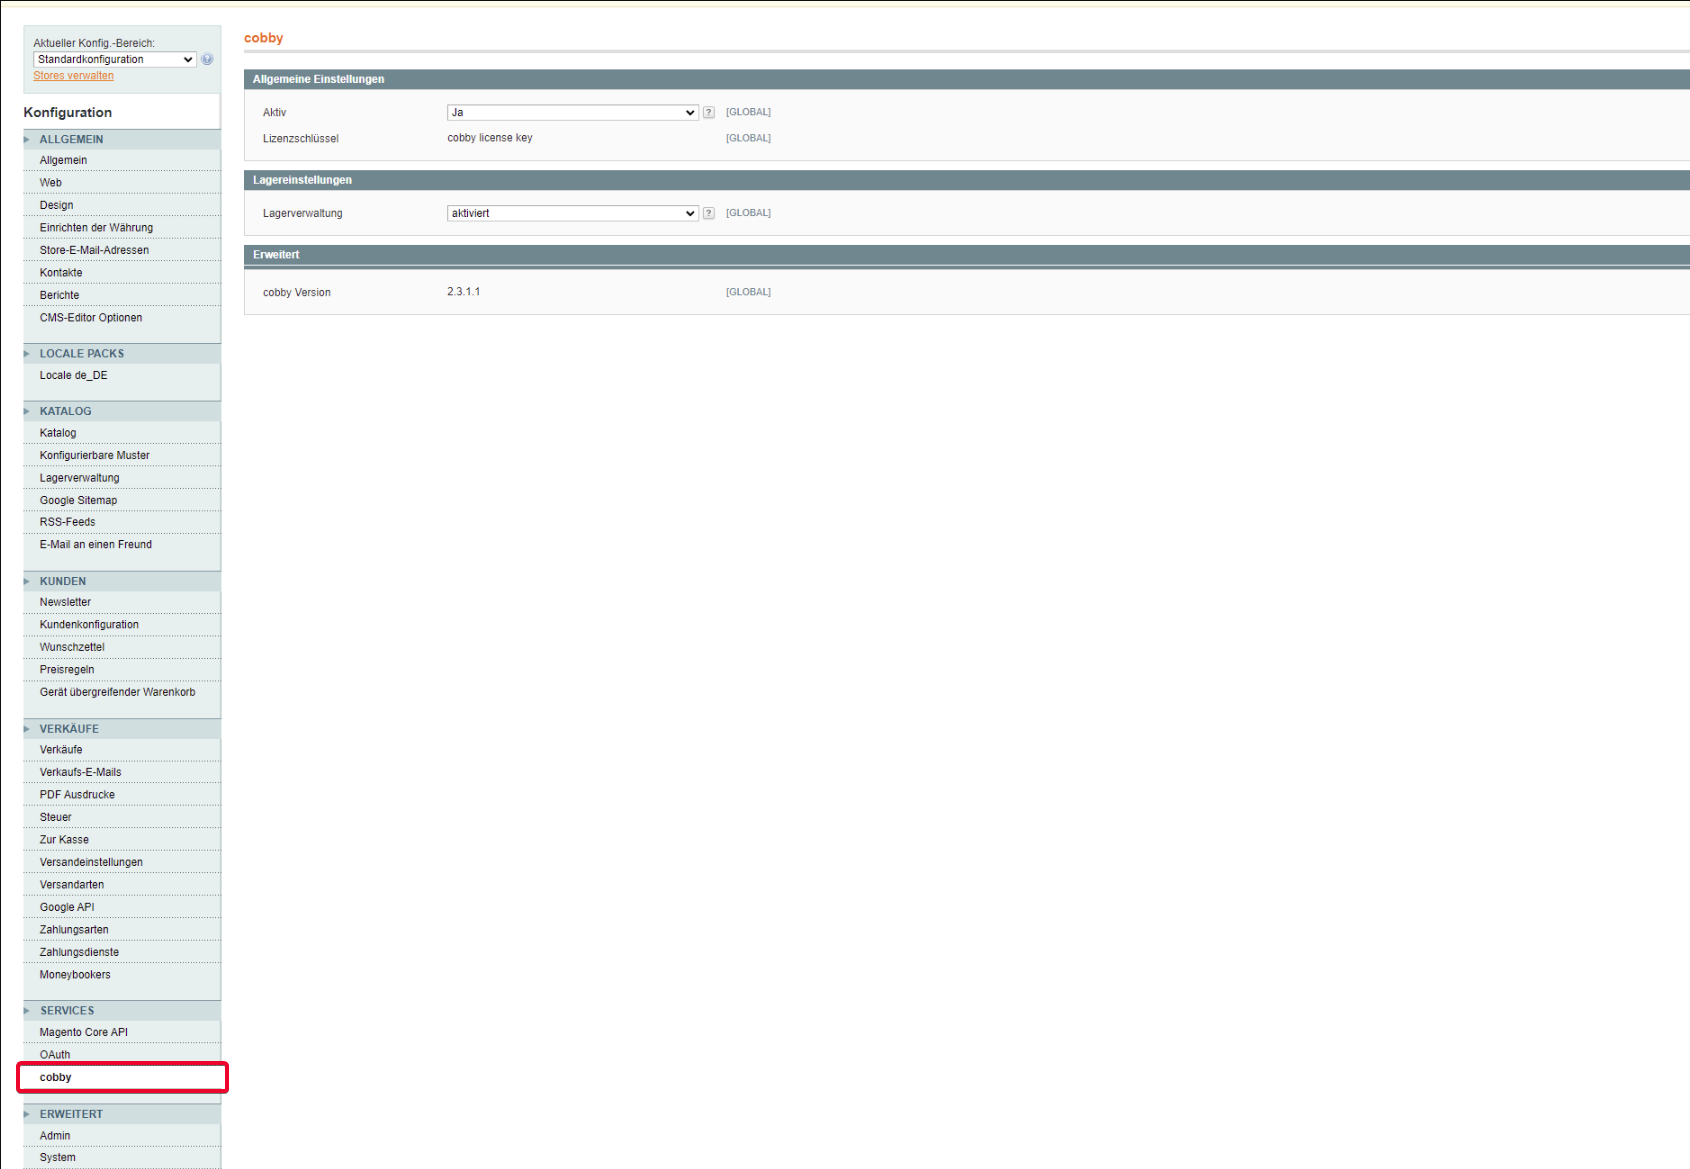
Go to System → Configuration → Services → cobby.
Step 7: Create an API Role for cobby
-
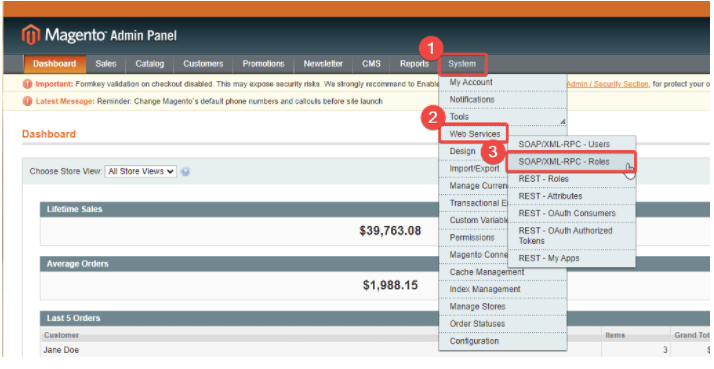
In the Magento Admin Panel, go to System → Web Services → SOAP/XML-RPC - Roles.
-
Click Add New Role.
-
In the Role Info tab:
- Role Name: Enter
cobby - Admin Password: Enter your current Magento admin password
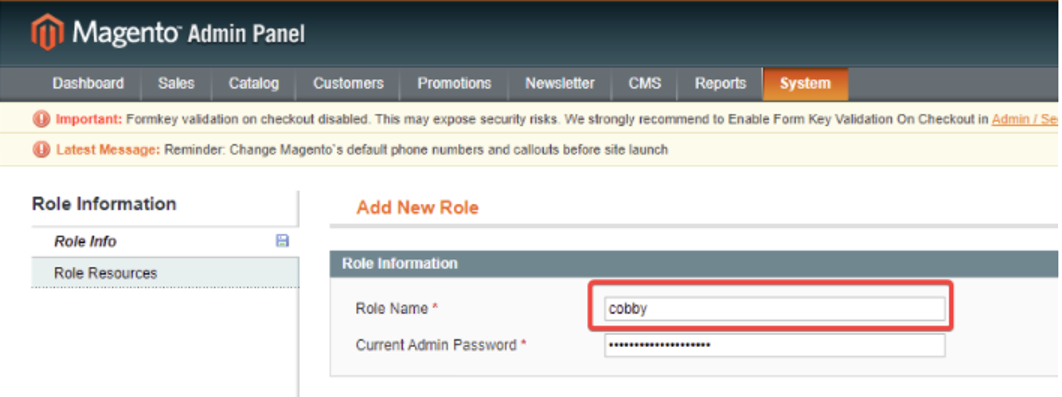
- Role Name: Enter
-
Switch to the Role Resources tab.
-
Under Resource Access, expand the tree and check the cobby checkbox.
-
Click Save Role in the upper right corner.

Step 8: Create an API User for cobby
-
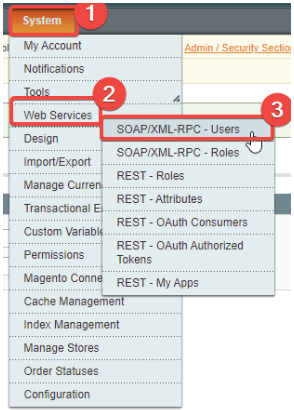
Go to System �→ Web Services → SOAP/XML-RPC - Users.
-
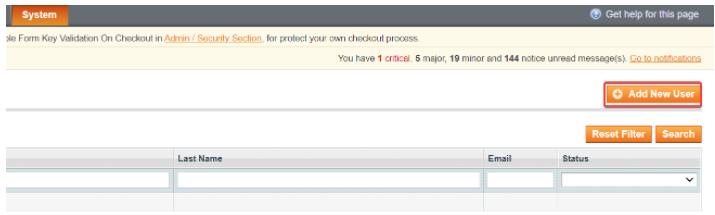
Click Add New User.
-
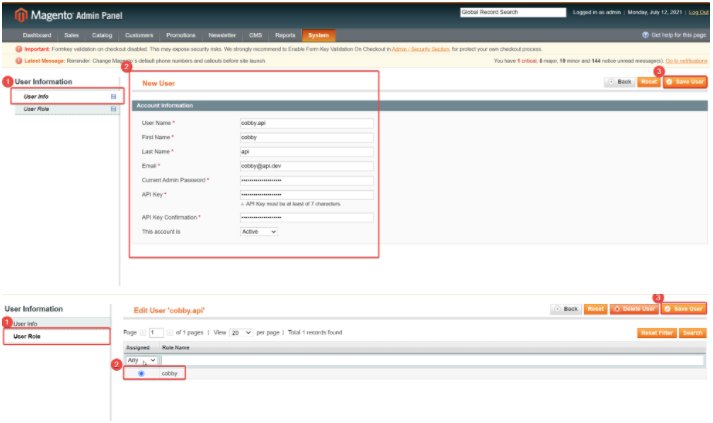
In the User Info tab, enter:
- User Name: Choose a username (e.g.,
cobby_api) - API Key: Create a secure API key (you'll need this later)
 tip
tipWrite down the username and API key - you'll need them to connect to the cobby portal.
- User Name: Choose a username (e.g.,
-
Switch to the User Role tab.
-
Select the cobby role you created earlier.
-
Click Save User in the upper right corner.
Step 9: Connect Your Shop to the cobby Portal
-
Return to the cobby portal.
-
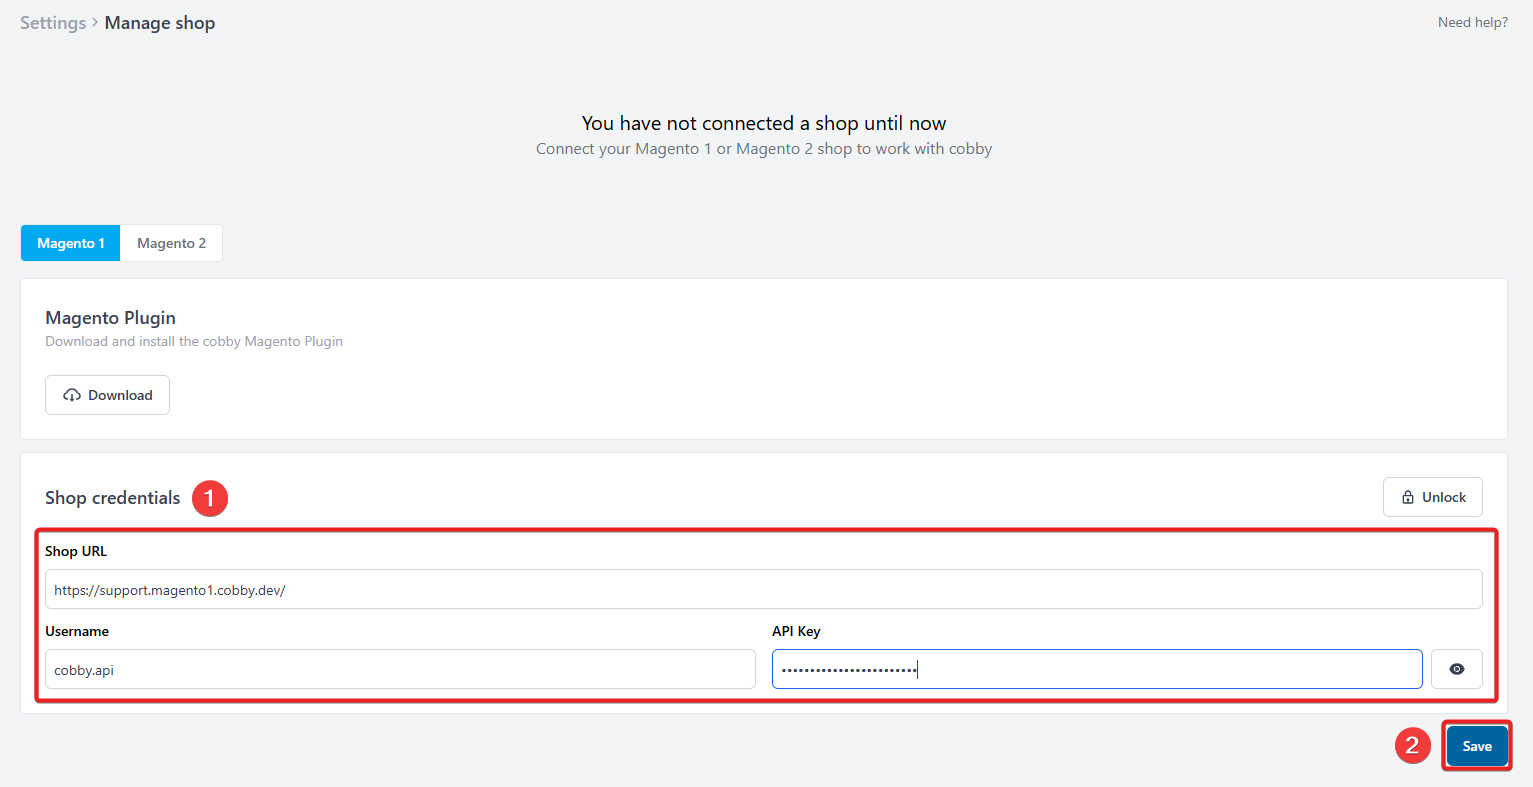
In your workspace settings, enter:
- Shop URL: Your Magento shop URL (e.g.,
https://yourshop.com) - User Name: The API username you created
- API Key: The API key you created
- Shop URL: Your Magento shop URL (e.g.,
-
Click Save.
Step 10: Save the Magento Configuration
-
Go to System → Configuration in your Magento Admin Panel.
-
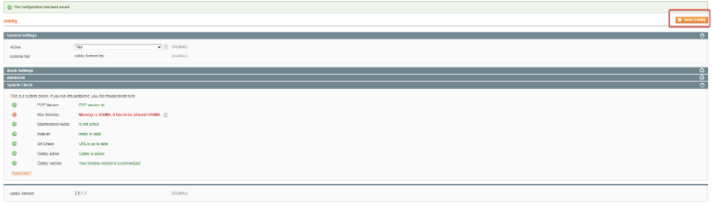
Click Save Config in the upper right corner (even if you didn't change anything).
The green text confirms that cobby is properly configured in Magento 1!
Step 11: Wait for Synchronization
-
Return to the cobby portal.
-
Wait for the synchronization to complete (this may take several minutes depending on your catalog size).
-
Once complete, the status changes to Active.
Step 12: Download and Install the cobby Excel Plugin
-
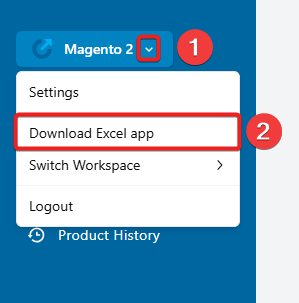
In the cobby portal, go to the menu on the left and open the dropdown menu by clicking on the little arrow next to your selected workspace.
-
Click on Download Excel app to start the download of the Excel plugin.
-
Click the download link to download the plugin installer.
-
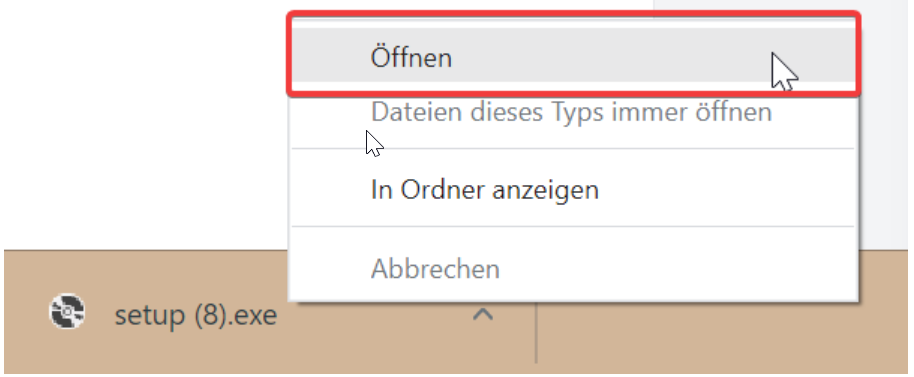
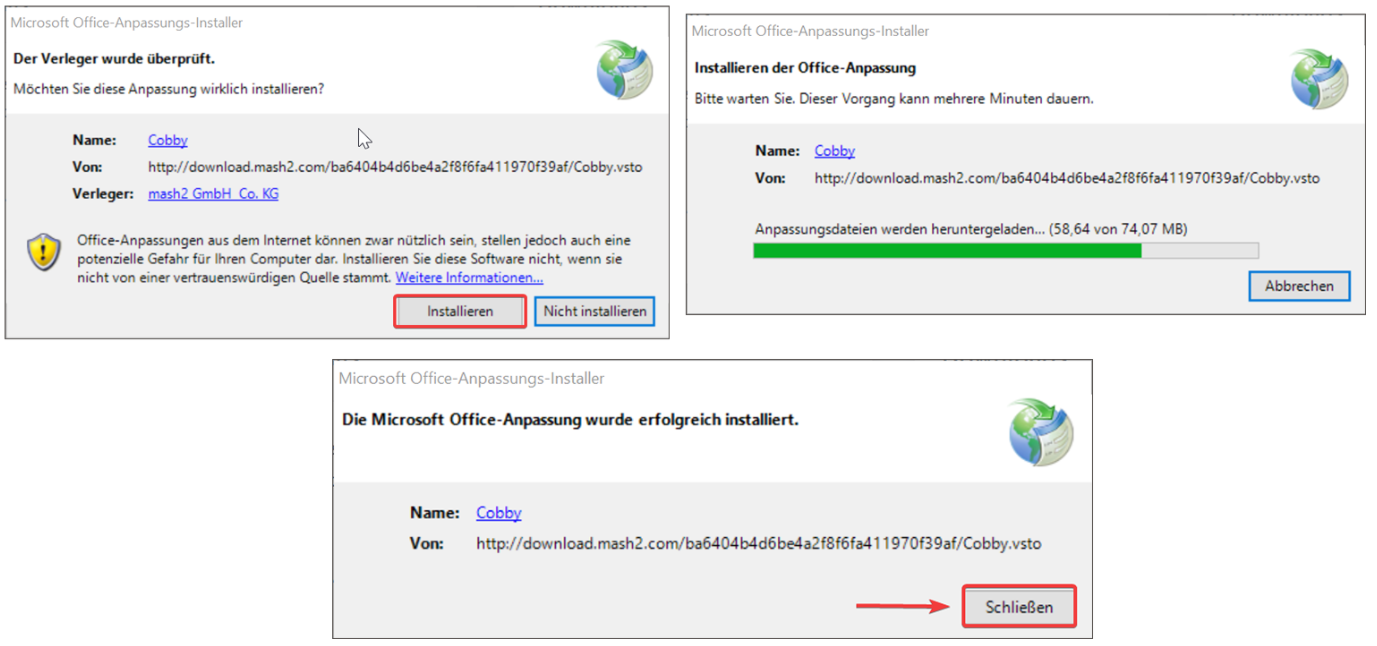
Right-click the downloaded file and select Open.
-
In the installer window, click Install.
-
Wait for the installation to complete.
-
Click Close.
Step 13: Load Your Products in Excel
-
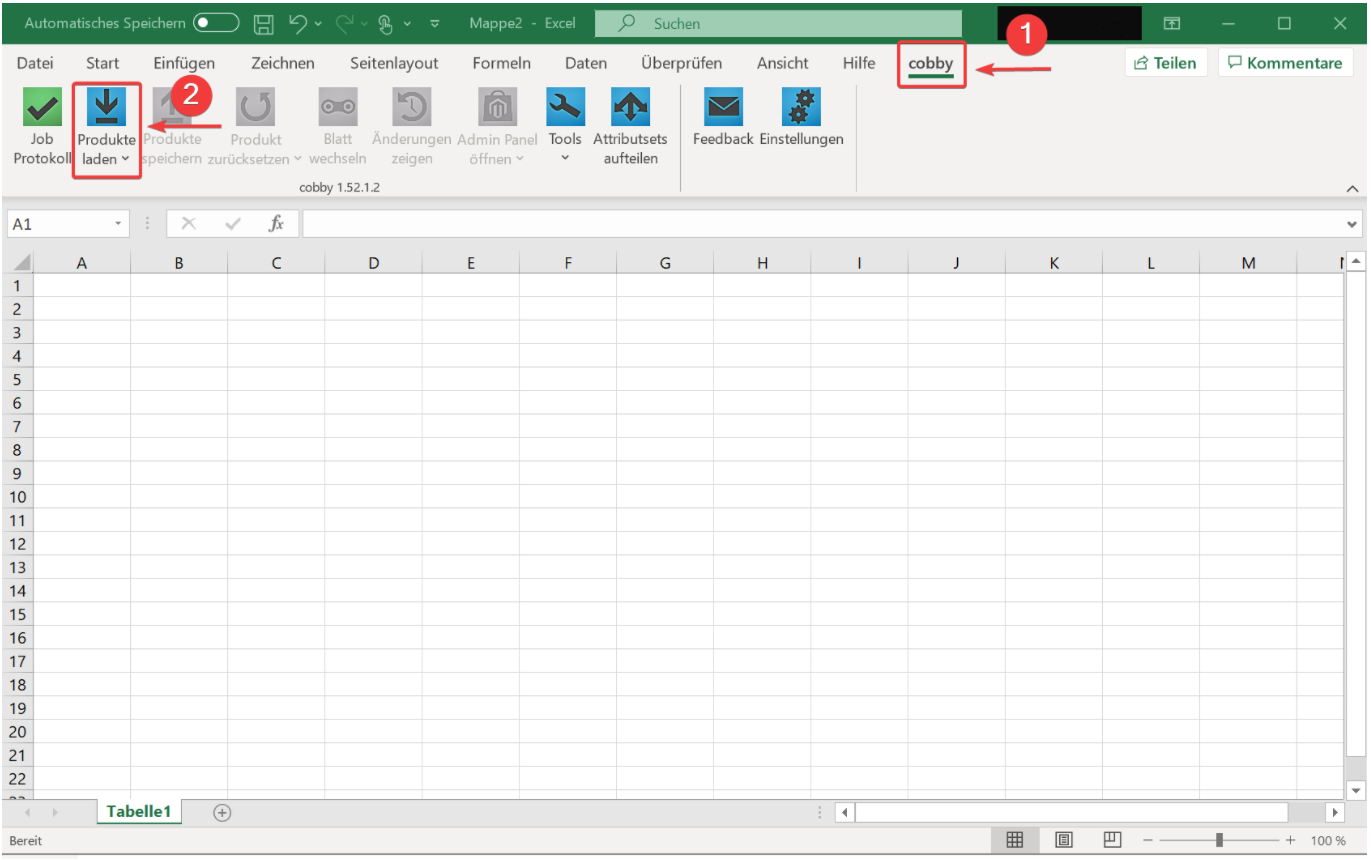
Open Microsoft Excel.
-
Click on the cobby tab in the ribbon.
-
Click Load products.
Next Steps
- Edit product data in Excel
- Set up category management
- Configure image handling
- Explore advanced features like bulk updates and custom attributes
If you encounter any issues during installation, please contact our support team or check our installation troubleshooting guide.