Install cobby for Magento 2
This guide shows you how to install and configure cobby for your Magento 2 shop.
Prerequisites
- A cobby account at app.cobby.io
- Admin access to your Magento 2 backend
- Your Magento admin password
- Microsoft Excel installed on your computer
Watch our step-by-step video guide for the complete setup process:
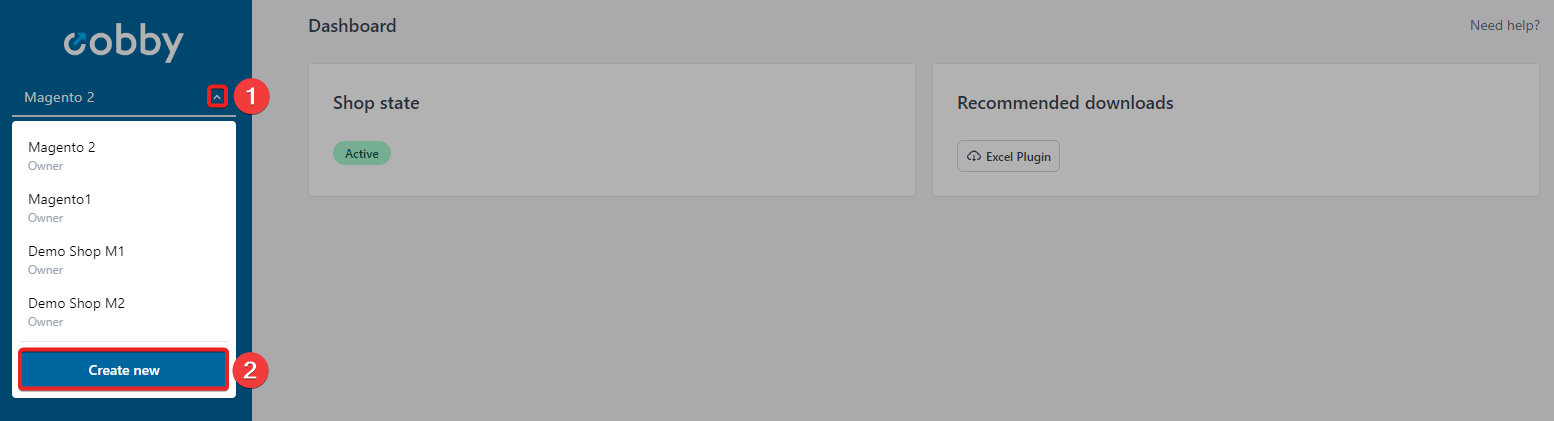
Step 1: Create Your Workspace in the cobby Portal
-
Log in to the cobby portal at app.cobby.io.
-
Click on the little arrow on the left to view all workspaces.
-
Click on Create new to add a new workspace.
-
Give your workspace a meaningful name (e.g., "My Magento 2 Shop").
-
Click Create.

-
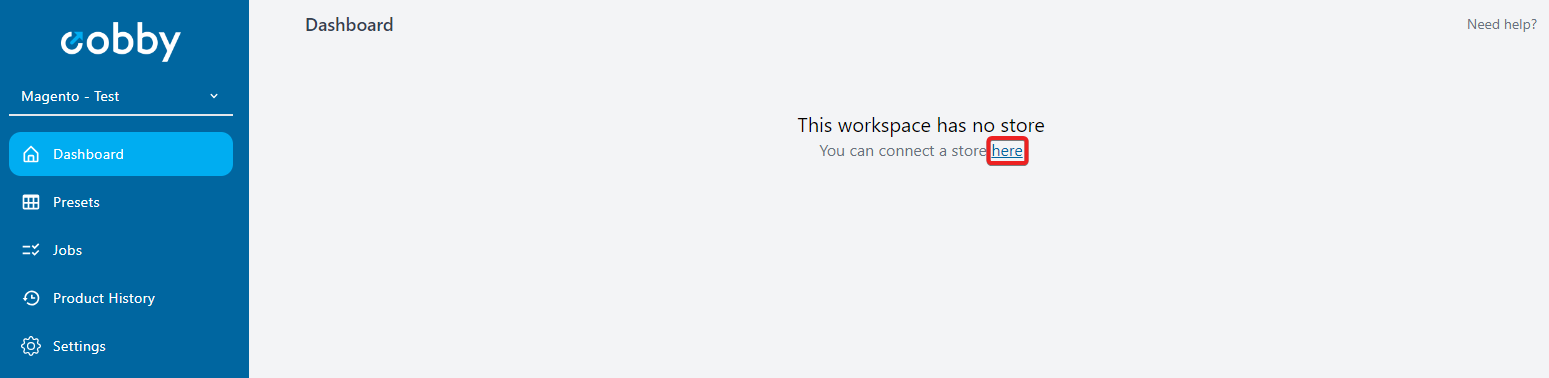
Click on here to continue with the setup.
Each workspace can only be connected to one shop and one license. If you have multiple shops (e.g., staging and production) or are migrating from Magento 1 to Magento 2, you'll need to create separate workspaces for each.
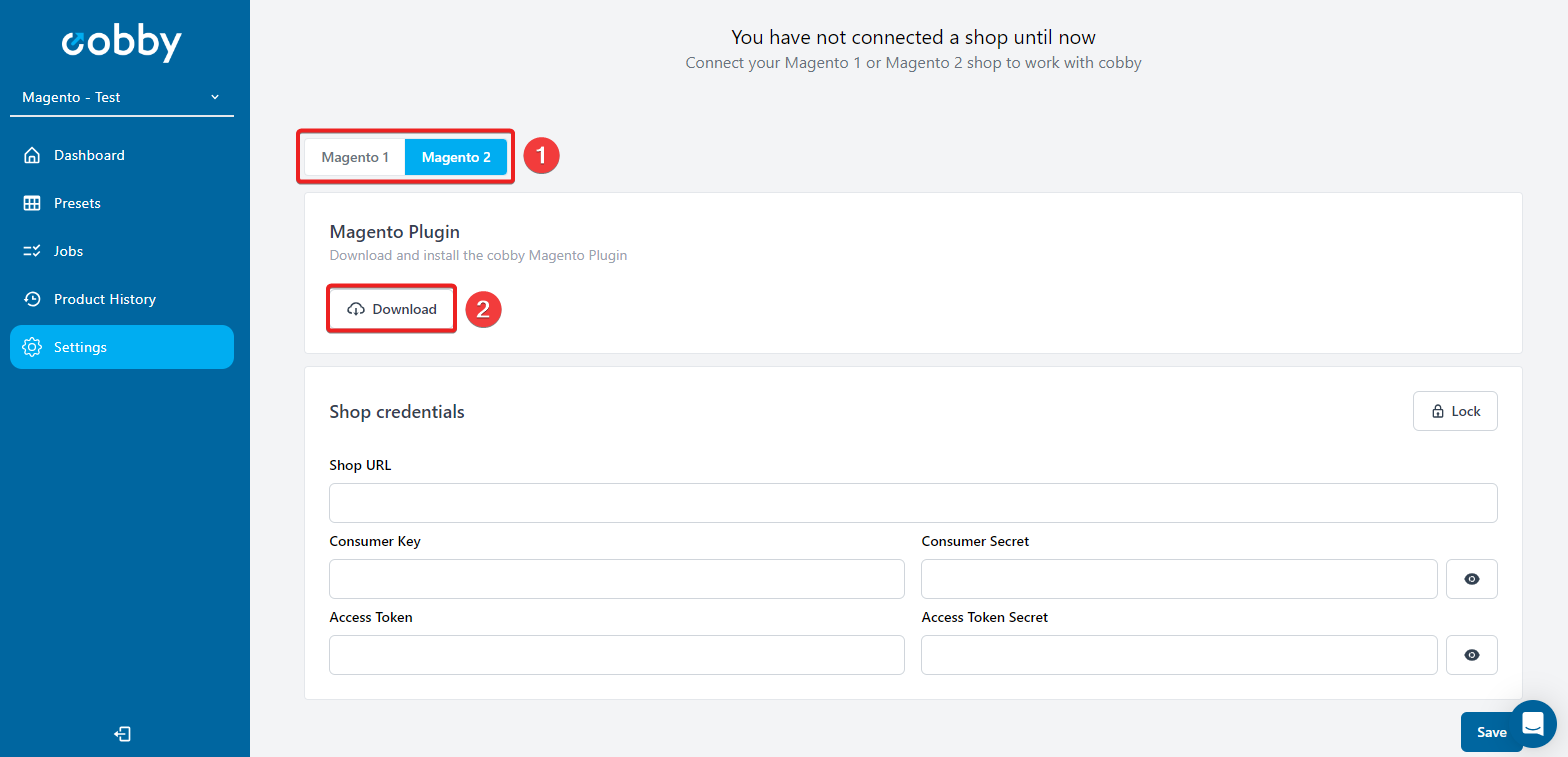
Step 2: Select Your Shop System and Download the Extension
-
Select Magento 2 as your shop system.
-
Click the download button to download the cobby extension for Magento 2.
For detailed installation instructions, you can also refer to our GitHub repository.
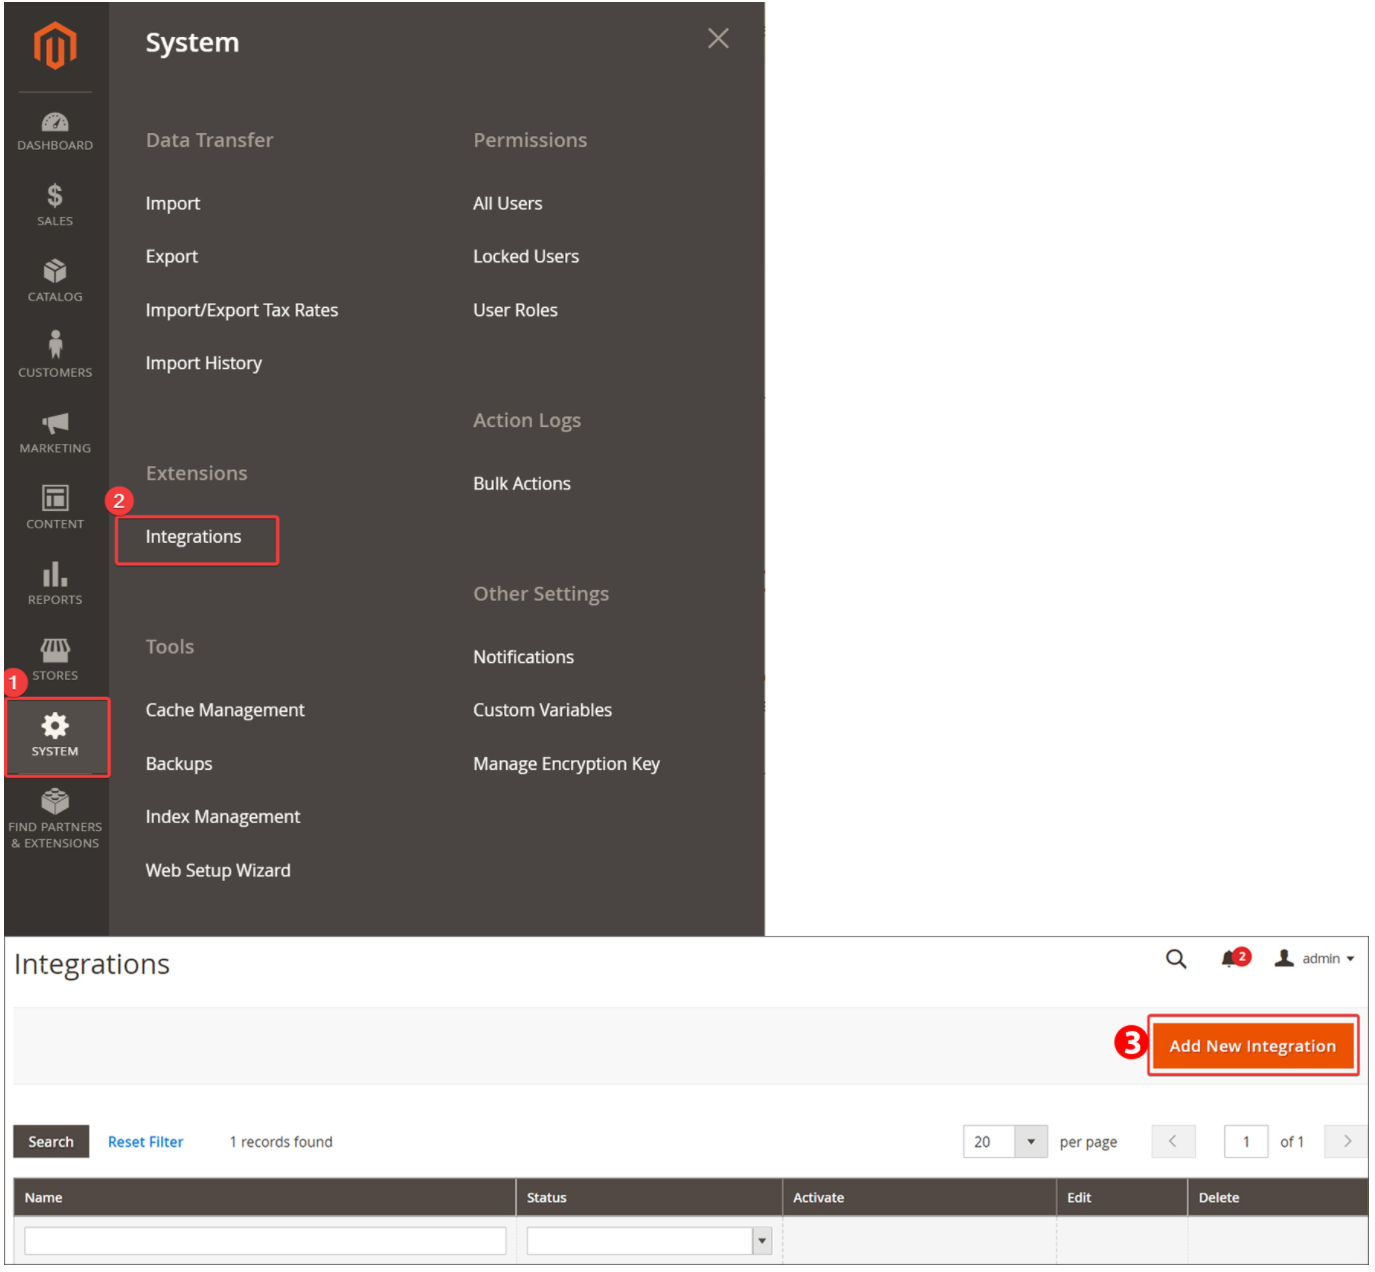
Step 3: Create an Integration in Magento 2
-
Go to your Magento Admin Panel and log in.
-
Navigate to System → Integrations.
-
Click Add New Integration in the upper right corner.
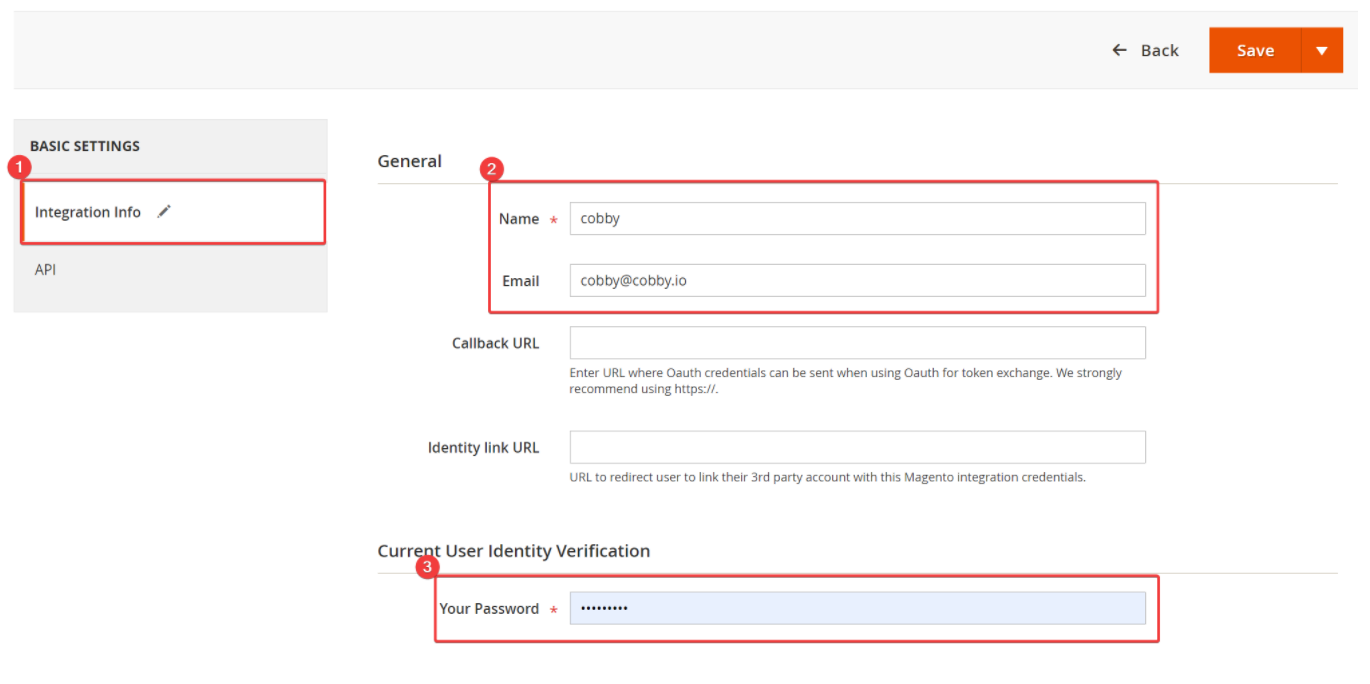
Step 4: Configure the Integration Settings
-
In the Integration Info tab, enter the following:
- Name: cobby
- Email: Your email address
- Your Password: Your Magento backend password
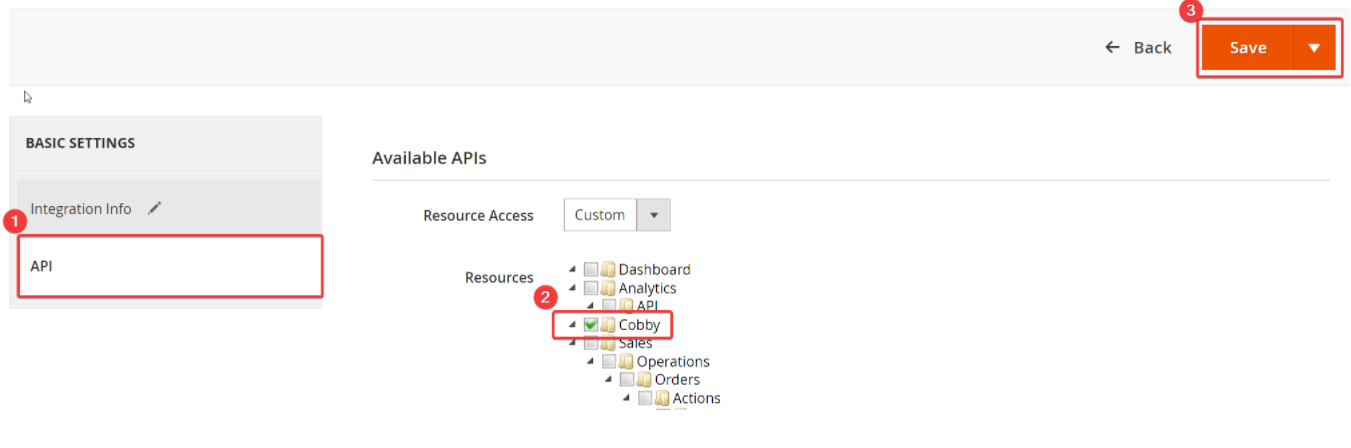
-
Switch to the API tab.
-
Check the cobby checkbox to grant API access.
-
Click Save in the upper right corner.
Step 5: Activate the Integration
-
Find your newly created cobby integration in the list.
-
Click Activate in the Actions column.

-
A confirmation dialog appears - click Allow in the upper right corner.
Keep this window open - you'll need to copy these credentials in the next step.
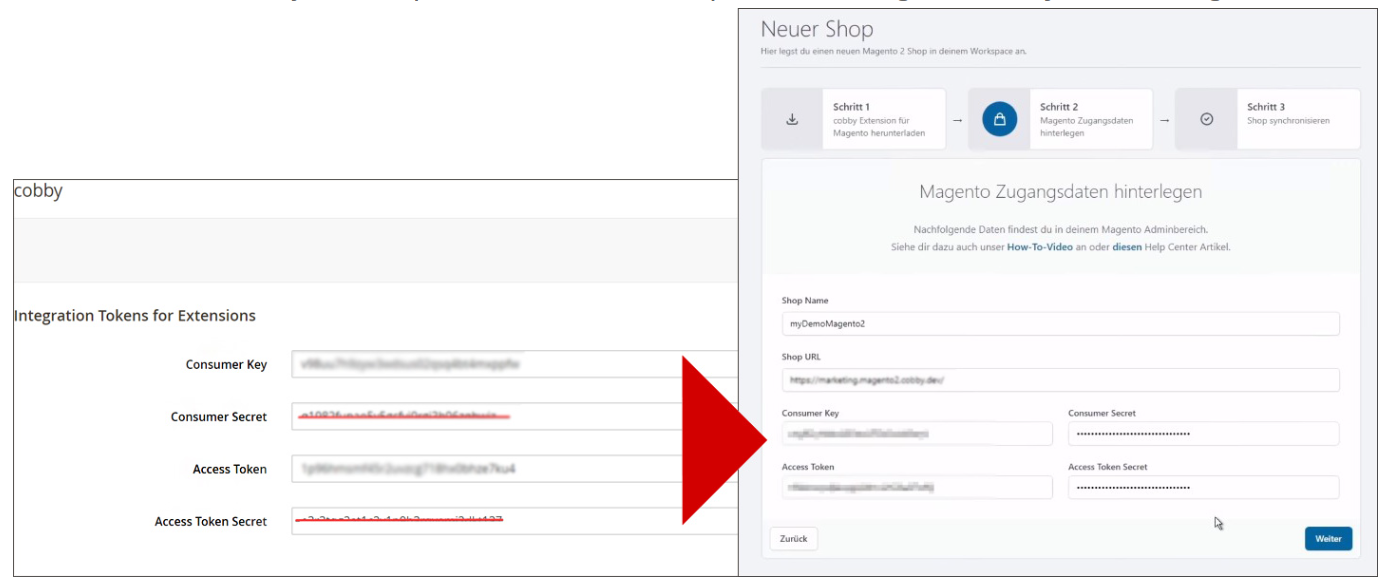
Step 6: Connect Your Shop to the cobby Portal
-
Copy the Access Token from the Magento screen.
-
Return to the cobby portal.
-
Paste the access token and other required credentials into the workspace settings.
-
Click Save.
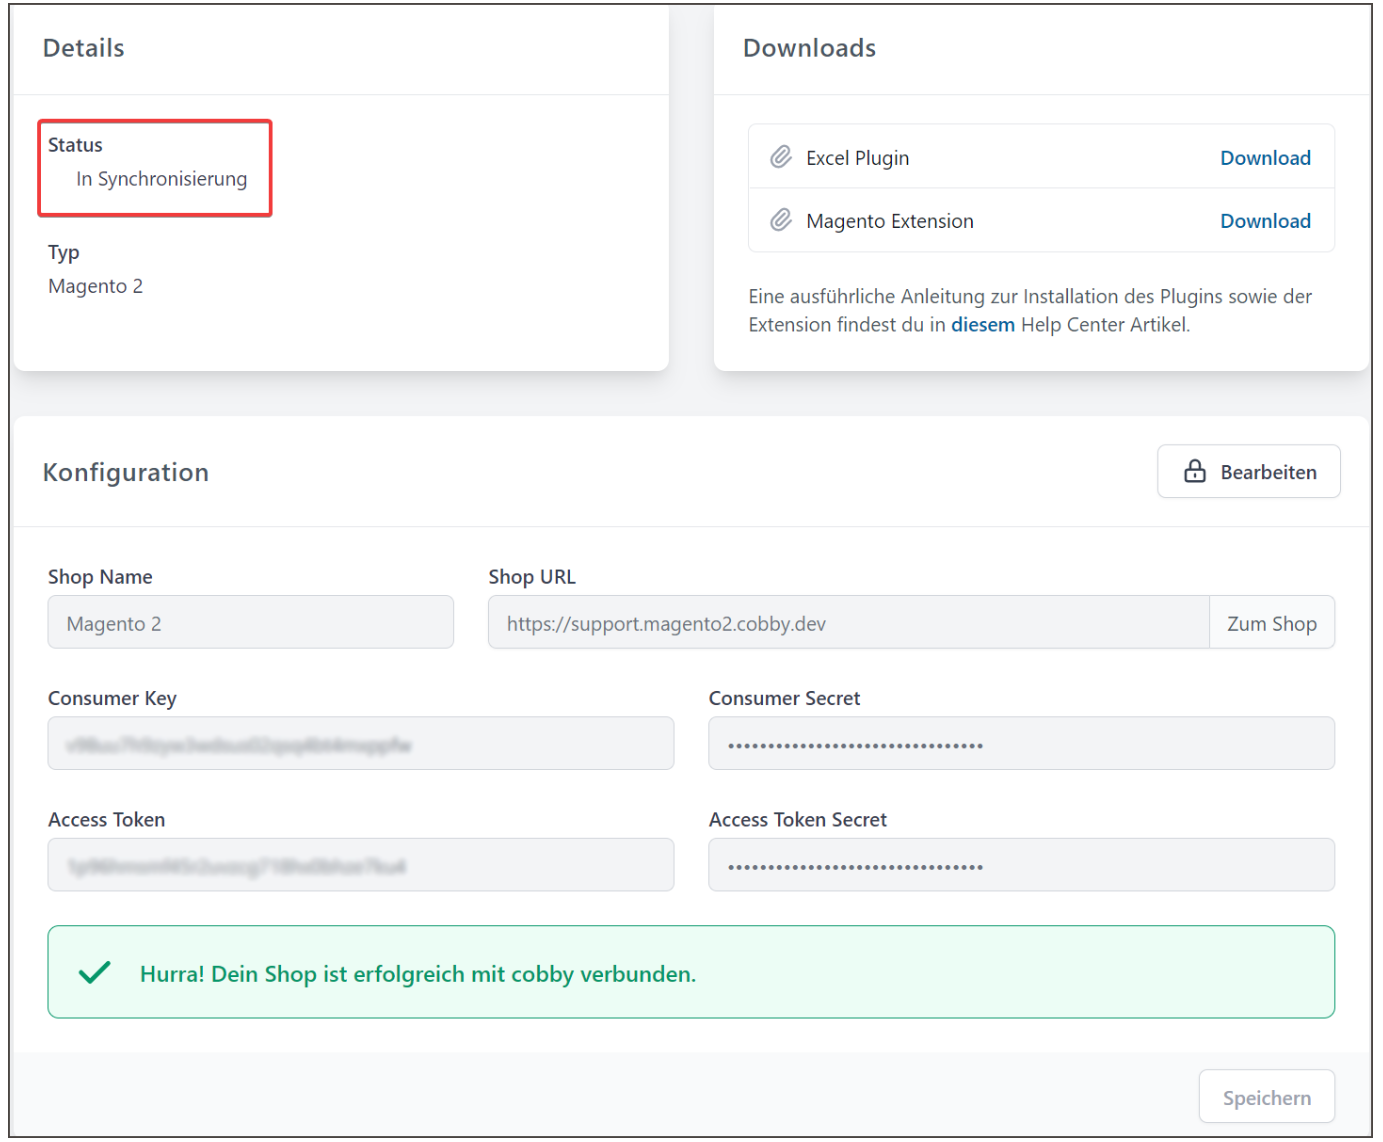
-
Wait for the synchronization to complete.
When you see the "Active" status, your shop data has been successfully synchronized with cobby! This may take several minutes depending on the size of your product catalog.
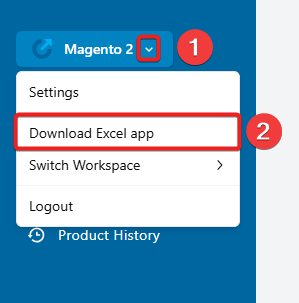
Step 7: Download and Install the cobby Excel Plugin
-
In the cobby portal, go to the menu on the left and open the dropdown menu by clicking on the little arrow next to your selected workspace.
-
Click on Download Excel app to start the download of the Excel plugin.
-
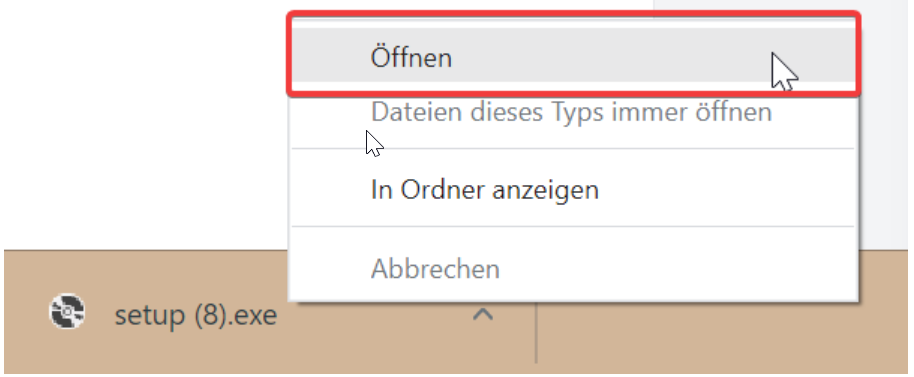
Click the download link to download the plugin installer.
-
Right-click the downloaded file and select Open.
-
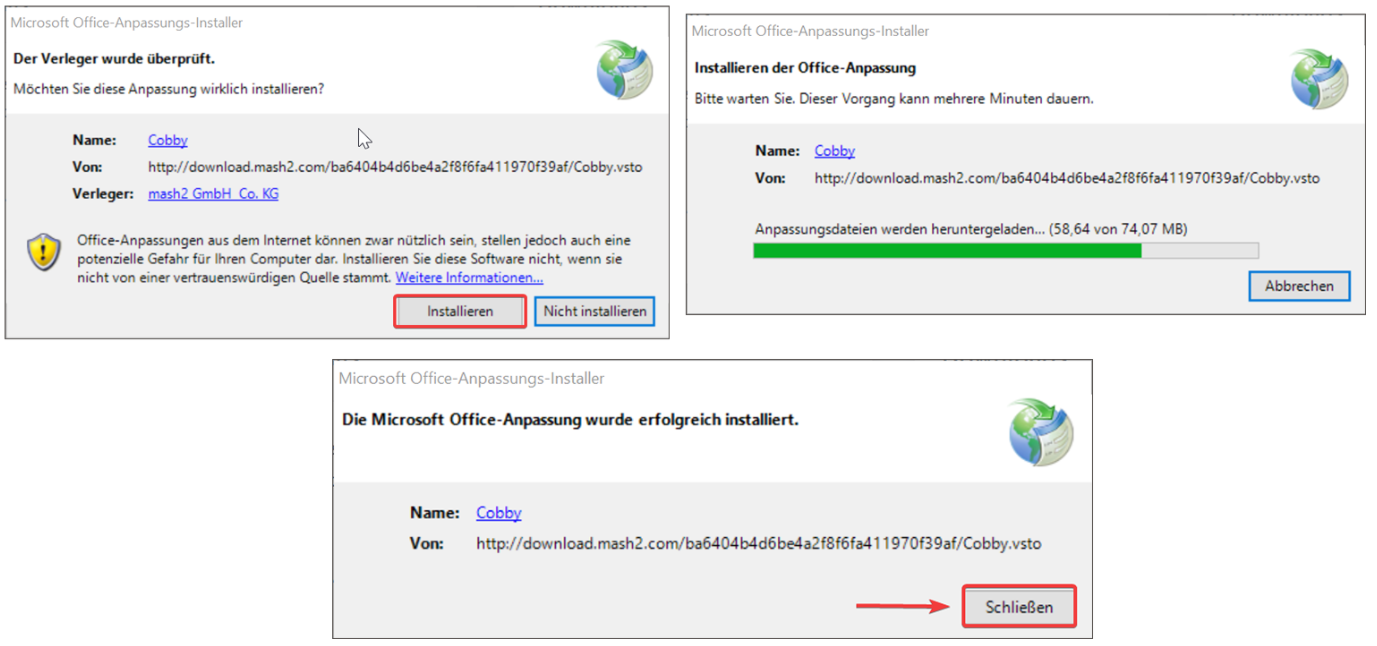
In the installer window, click Install.
-
Wait for the installation to complete.
-
Click Close.
Step 8: Load Your Products in Excel
-
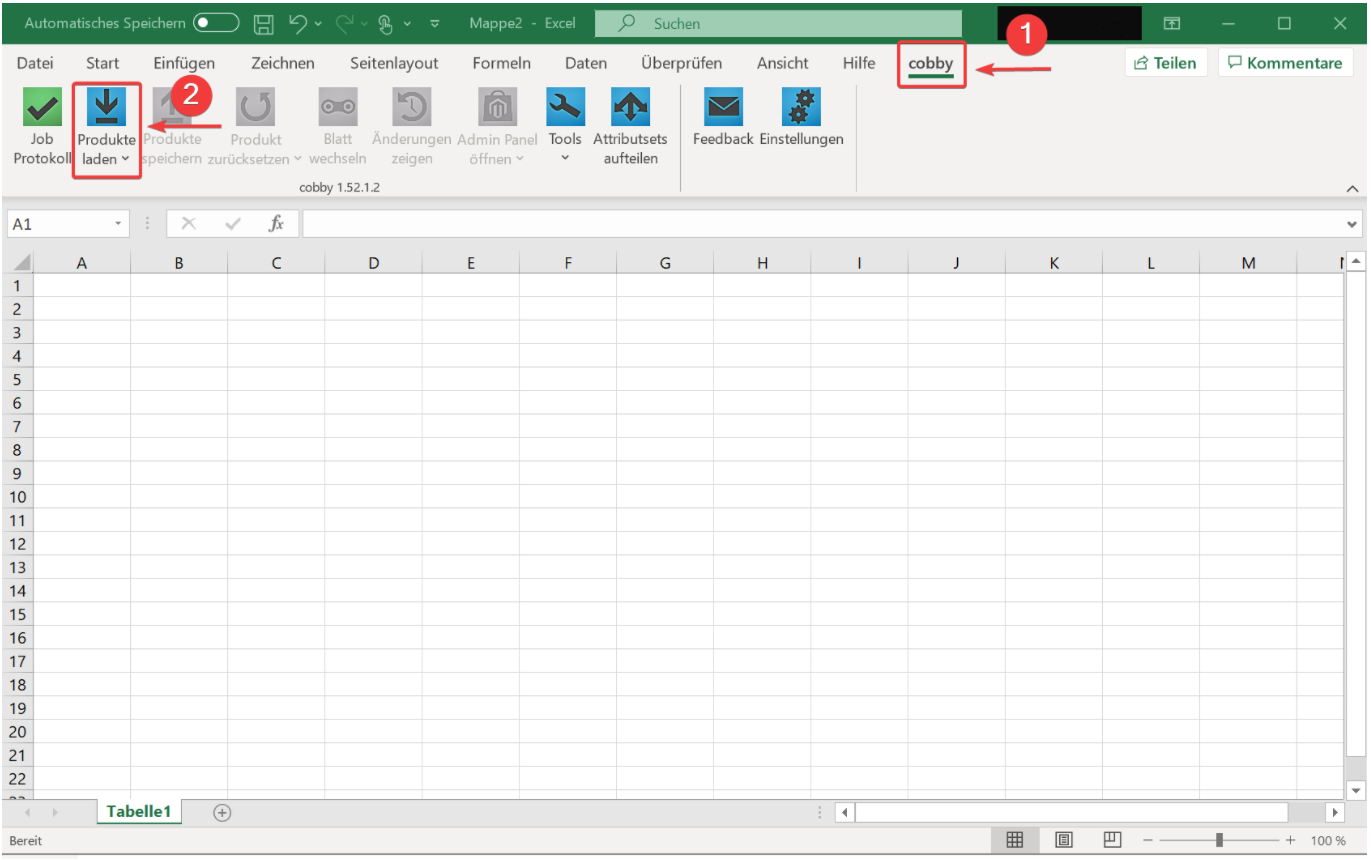
Open Microsoft Excel.
-
Click on the cobby tab in the ribbon.
-
Click Load products.
Next Steps
- Learn how to edit product data efficiently in Excel
- Set up category management
- Configure image handling
- Explore advanced features like bulk updates and custom attributes
If you encounter any issues during installation, please contact our support team or check our installation troubleshooting guide.