Install cobby for Shopware 6
This guide shows you how to install and configure cobby for your Shopware 6 shop.
Prerequisites
- A Shopware 6 shop with admin access
- Admin login credentials for your Shopware backend
- A Microsoft account
- Microsoft Excel (Microsoft 365 or standalone version)
You can explore an interactive demo of the installation process:
Step 1: Create a cobby Role in Shopware
First, create a dedicated role with the necessary permissions for cobby.
-
Log in to your Shopware 6 admin panel (e.g.,
https://yourshop.com/admin). -
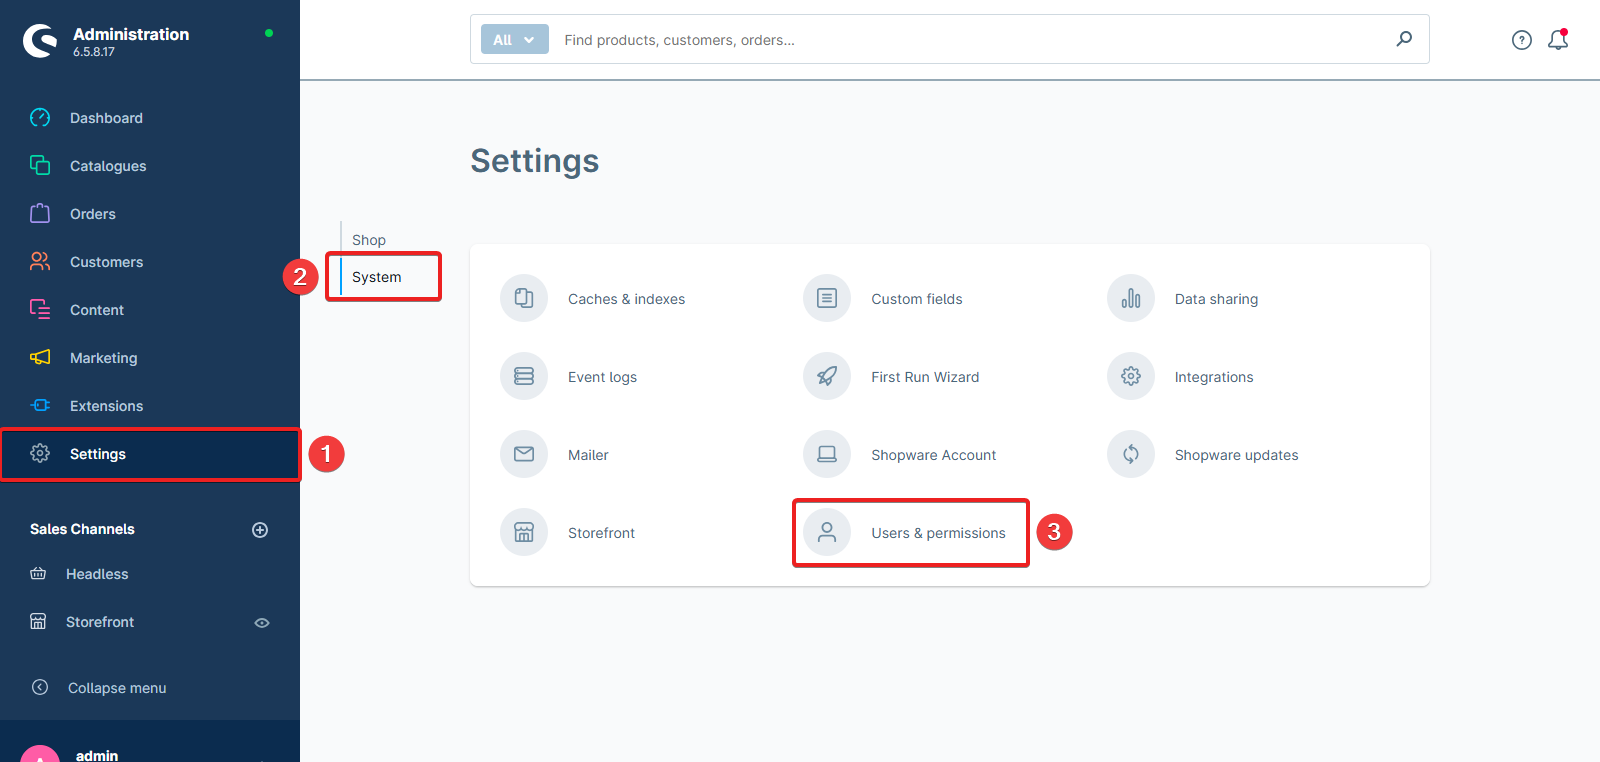
Navigate to Settings in the left sidebar.
-
Under System, click on Users & Permissions.
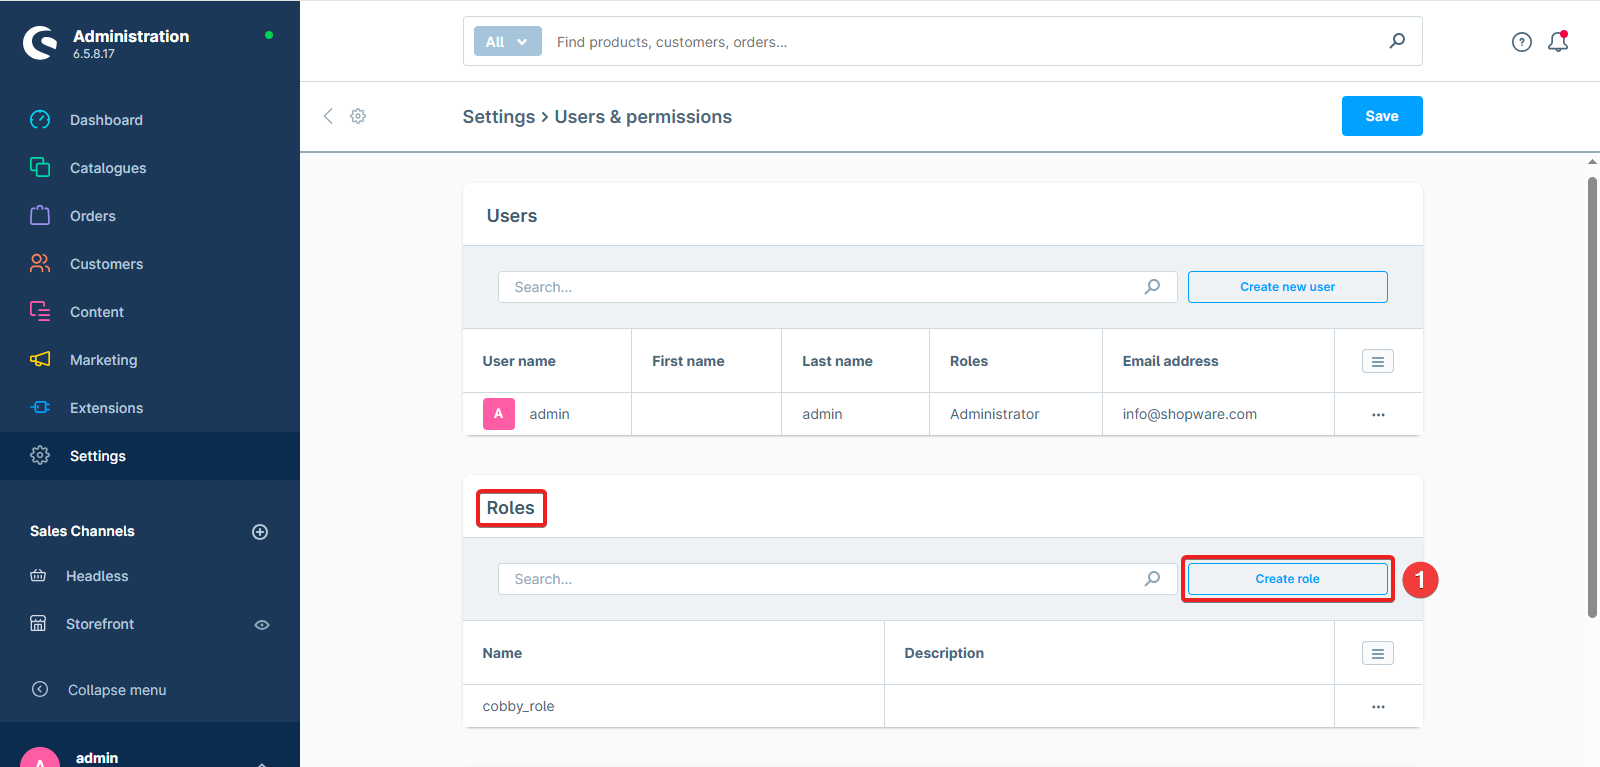
- Click Create role.
-
Enter a name for the role (e.g., "cobby") in the section General.
-
Click on Detailed privileges.
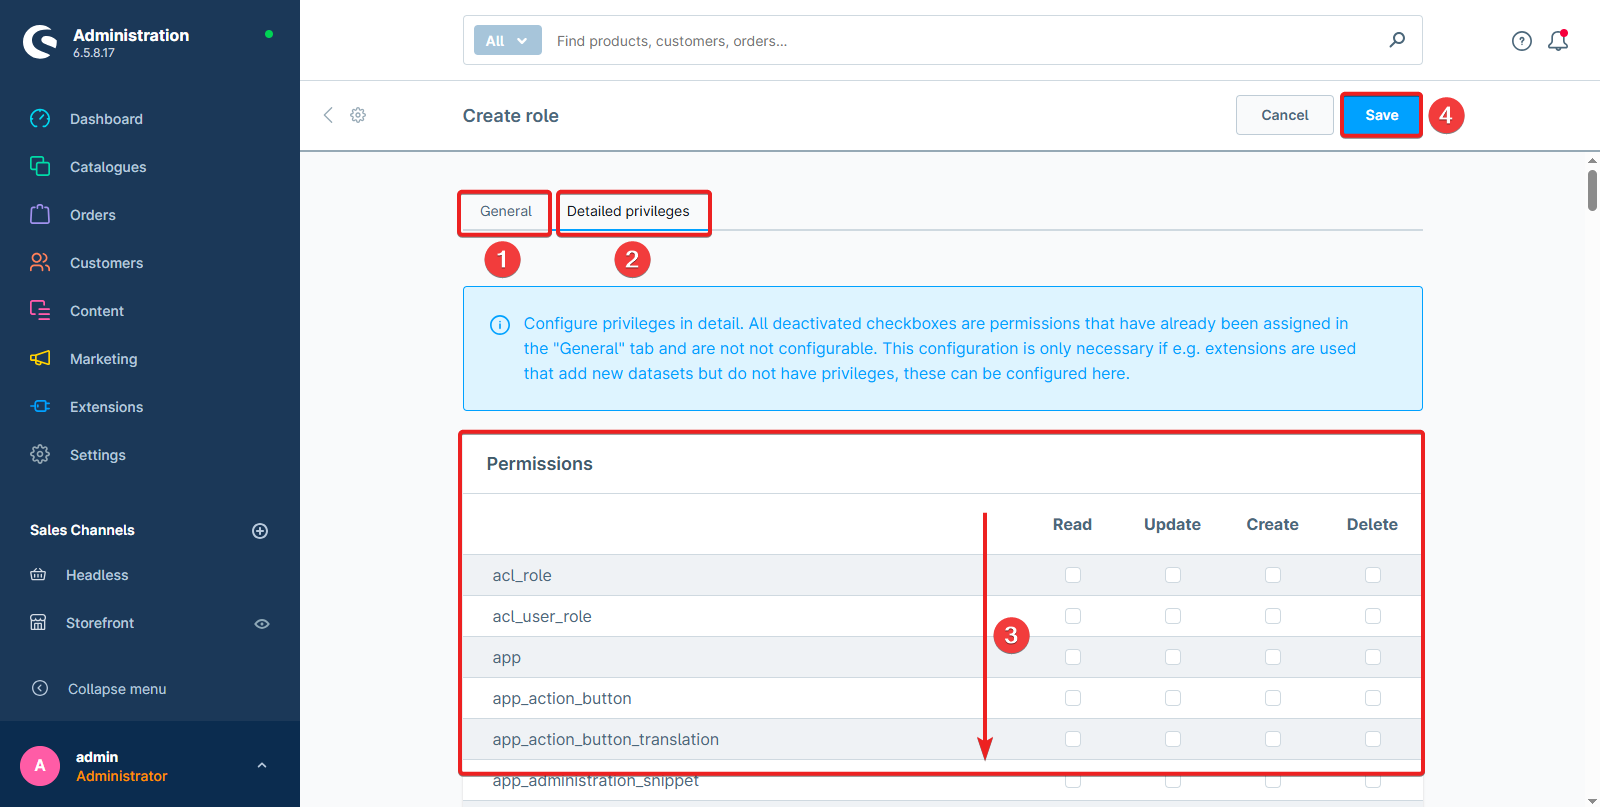
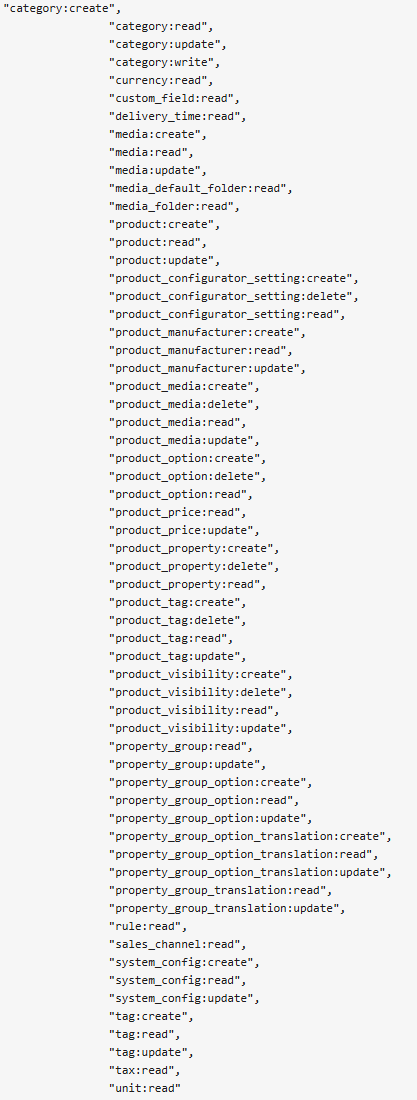
- Under Permissions, check the required permissions for cobby (see screenshot below):
- Click Save.
Step 2: Create an Integration with the cobby Role
Now create an integration that cobby will use to connect to your shop.
-
Go back to Settings > System.
-
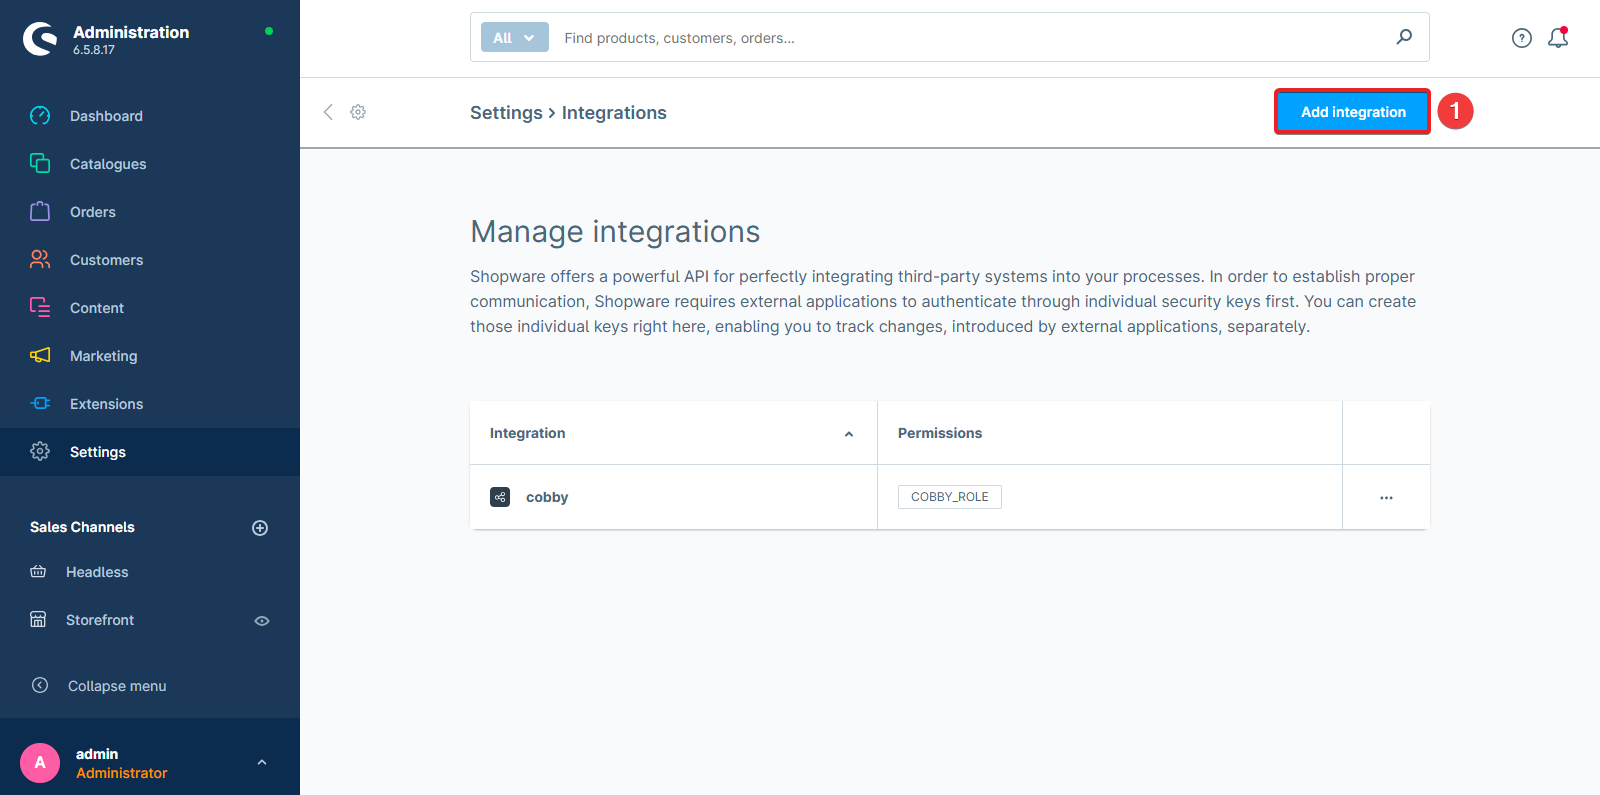
Click on Integrations.
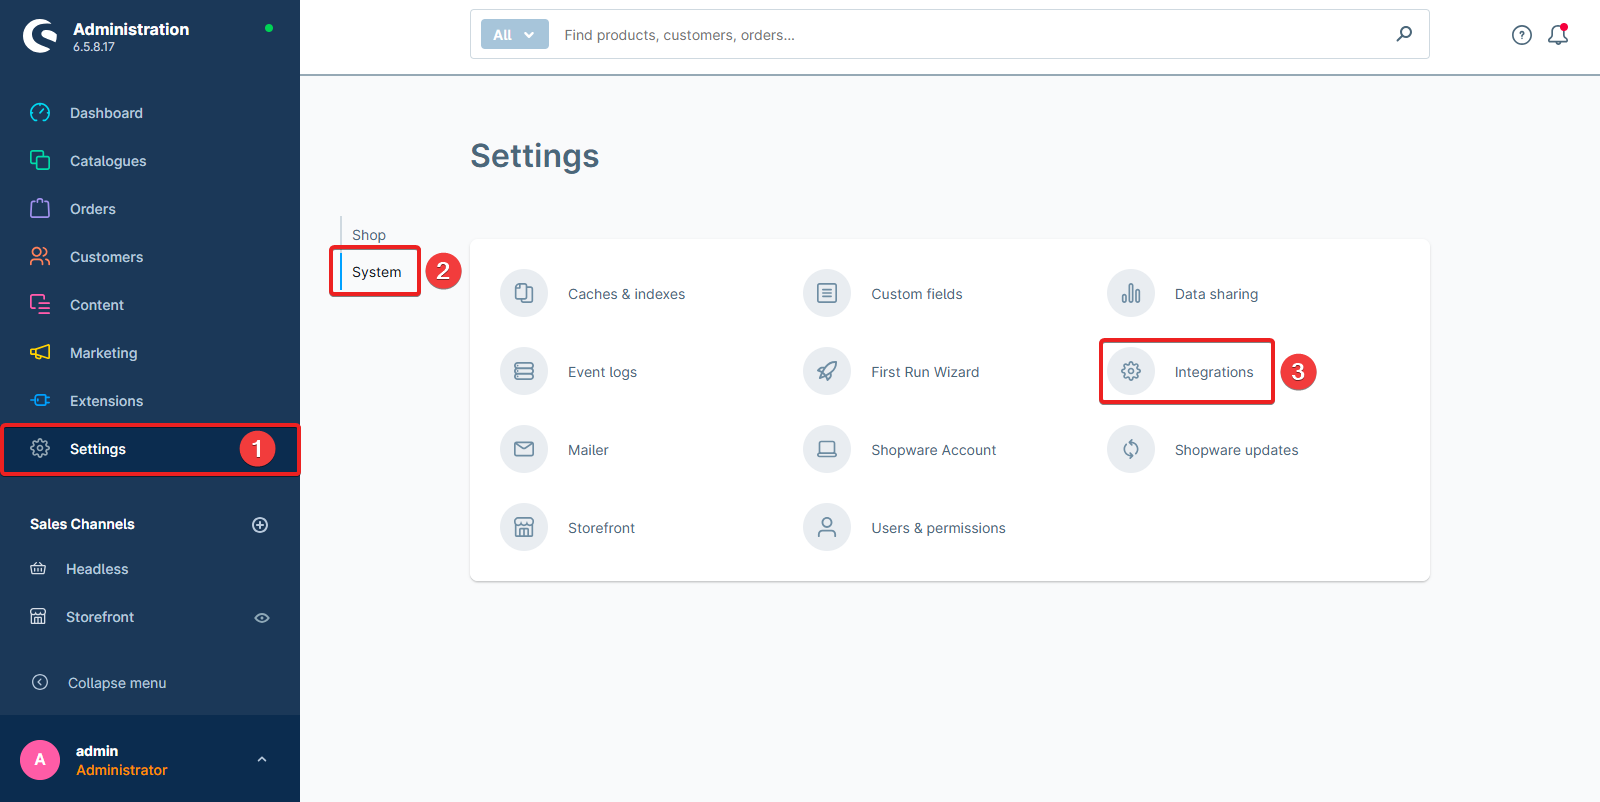
- Click Add integration.
-
Enter a name for the integration (e.g., "cobby").
-
Assign the cobby role you created in Step 1.
-
Important: Copy and save the following credentials:
- Access key ID
- Secret access key
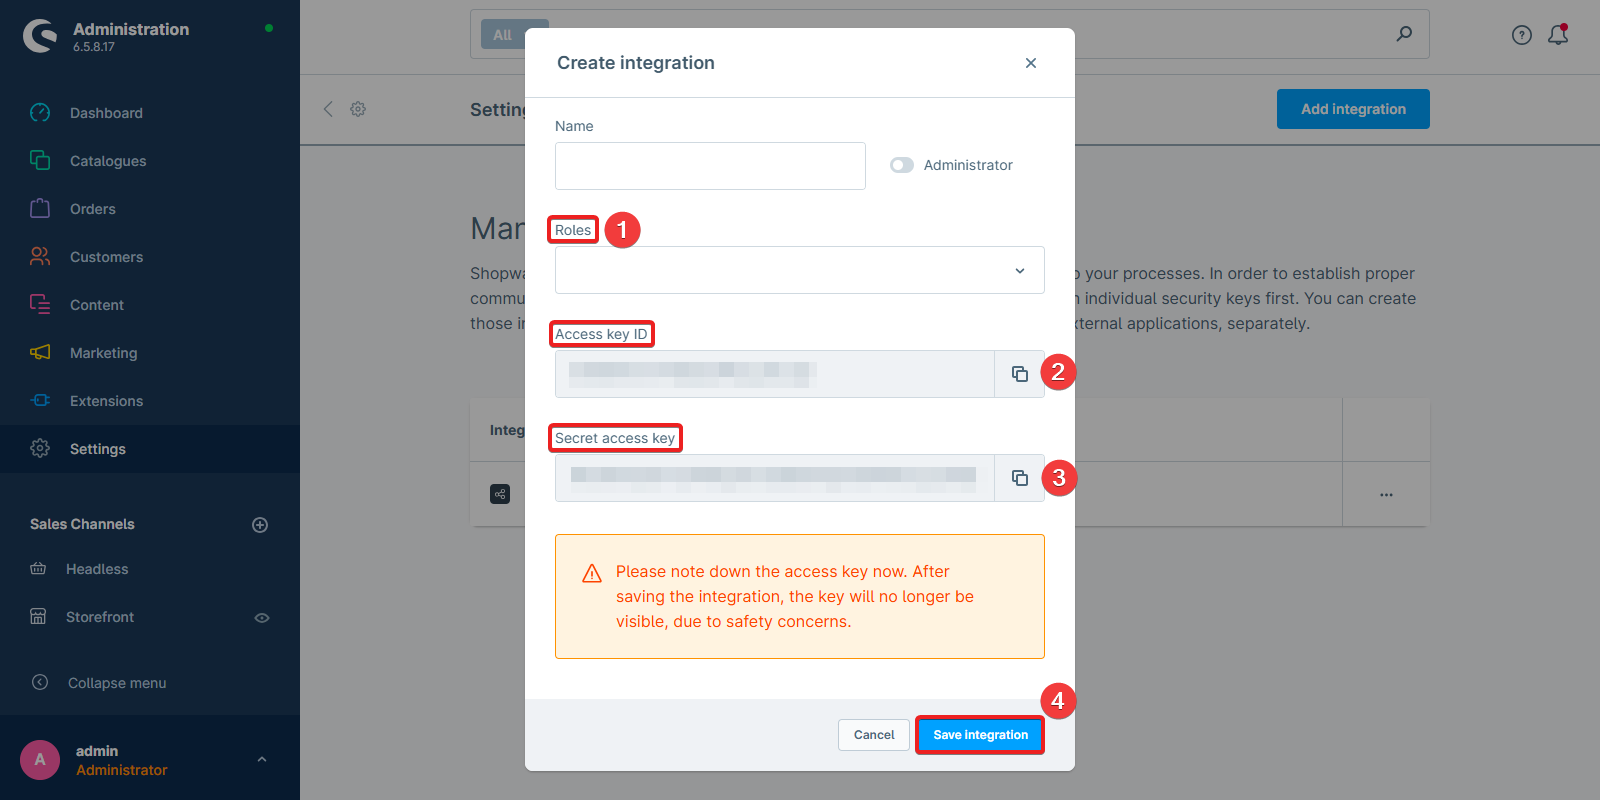
You'll need these credentials to connect cobby to your shop. Store them securely - the Secret access key won't be shown again after you close this dialog.
Step 3: Download and Install the cobby Extension
-
Download the cobby extension from https://github.com/cobbyio/shopware6-plugin-extension/releases.
-
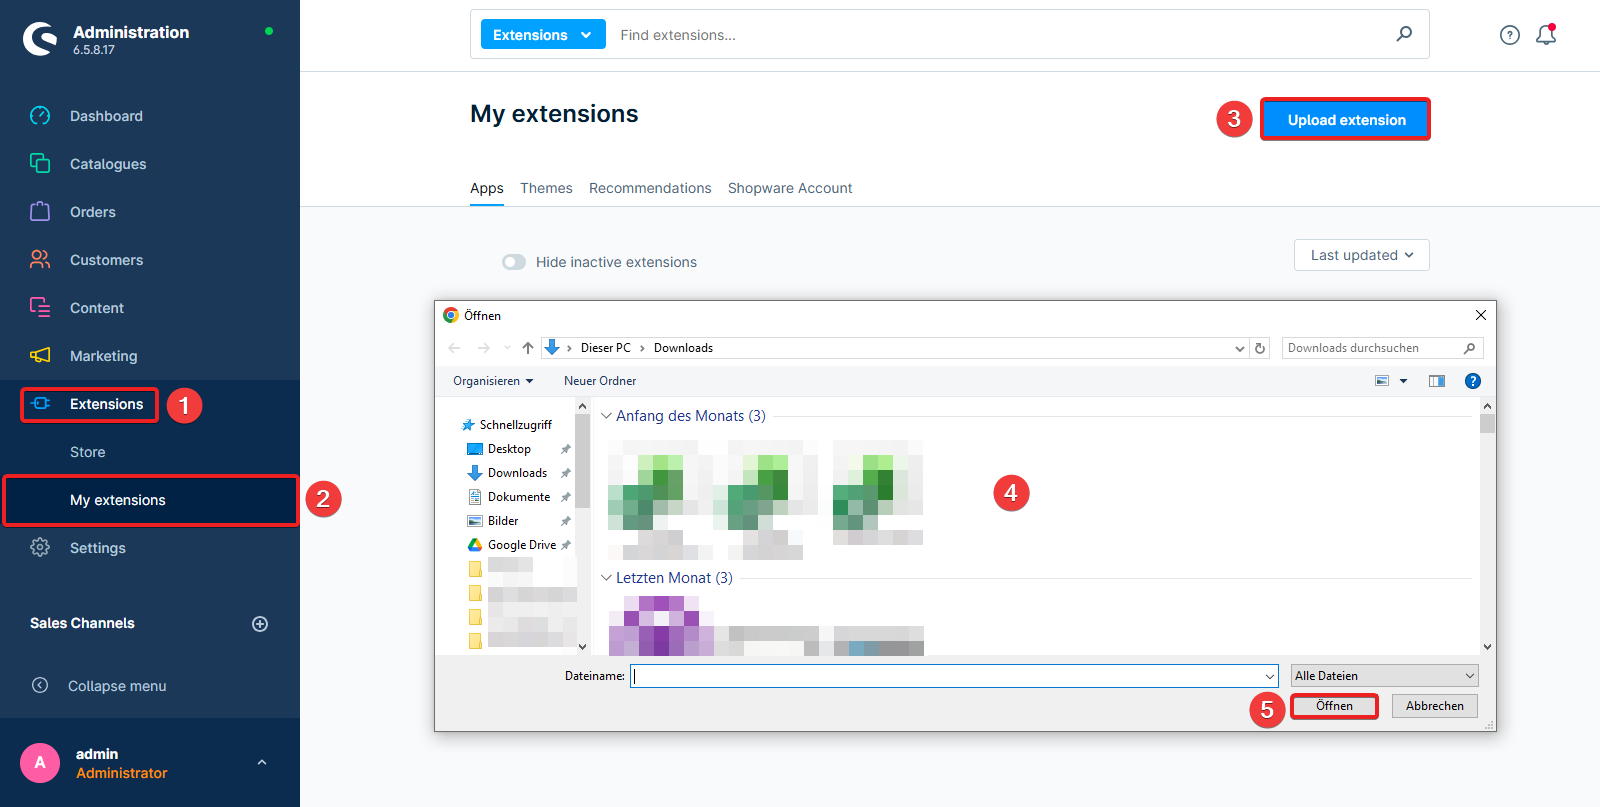
In Shopware, navigate to Extensions in the left sidebar.
-
Click on My extensions.
-
Click Upload extension in the top right corner.
-
Select the downloaded
Source code (zip)file.
-
Once uploaded, find cobby in the extensions list and click Install app.
-
Activate the extension by clicking the toggle switch (it should turn blue).
Keep track of where the ZIP file is saved - you'll need to locate it during upload.
Step 4: Register for the cobby Portal
You can complete this step before or after the Shopware configuration (Steps 1-3).
-
Go to https://app.cobby.io/login.
-
Click Register if you don't have an account yet.
-
Complete the registration form with your details.
-
Verify your email address and log in to the cobby portal.
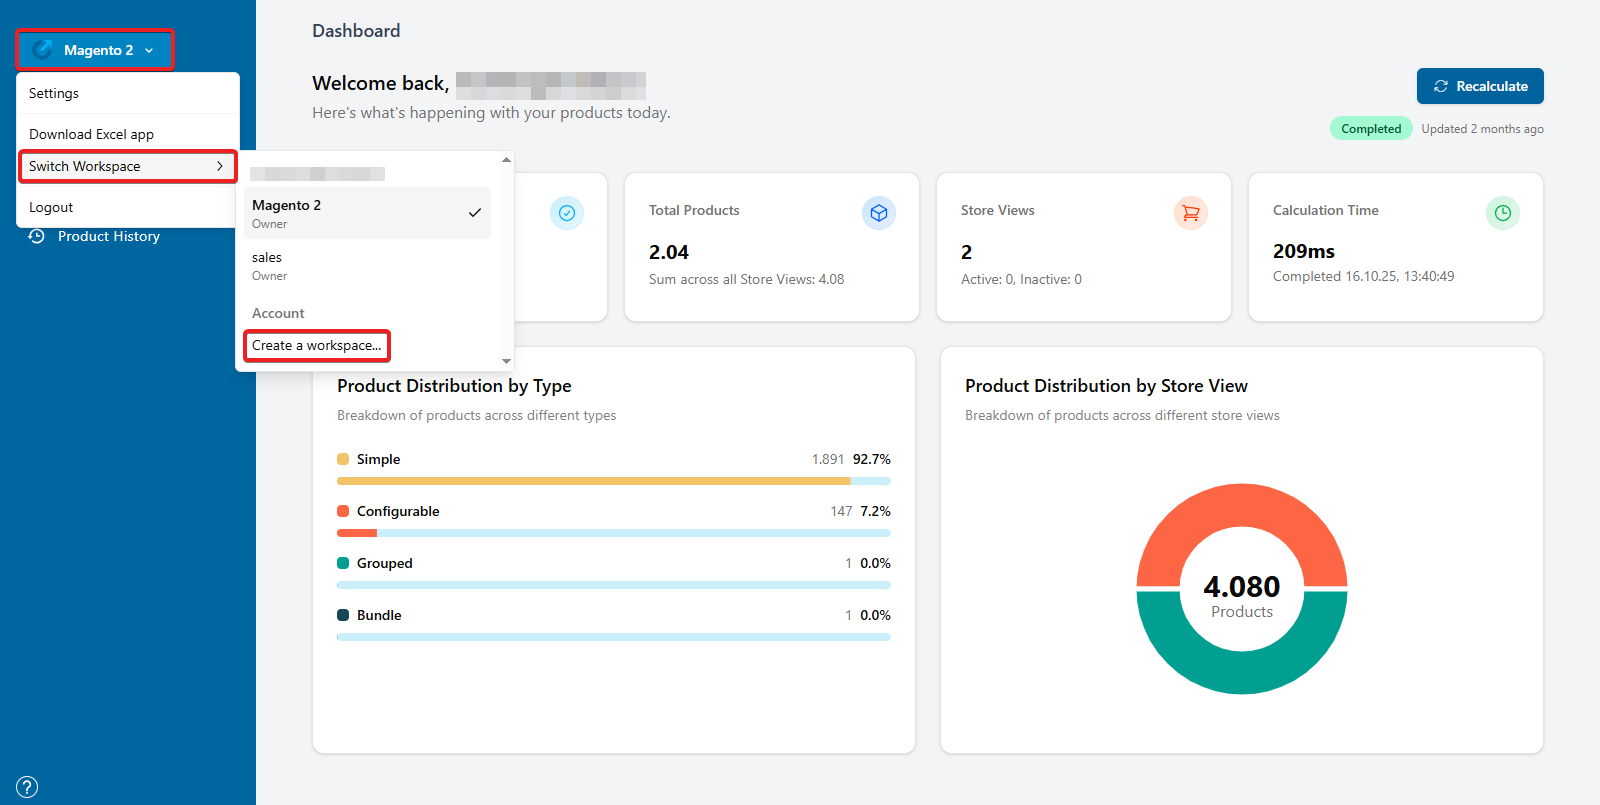
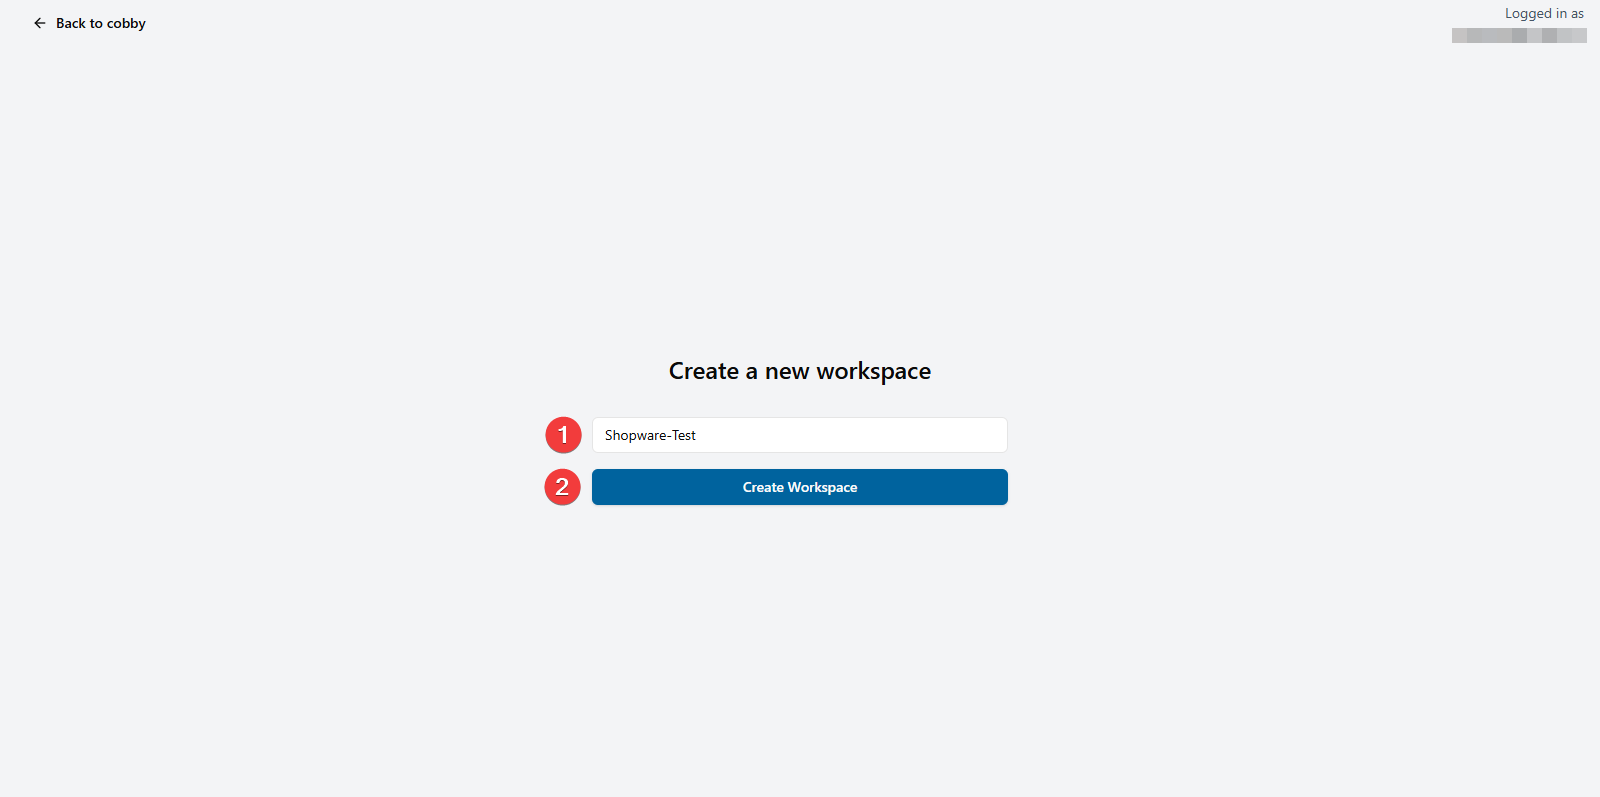
Step 5: Create a Workspace and Connect Your Shop
- Log in to the cobby portal at https://app.cobby.io.

- Click Create Workspace (or select an existing workspace).
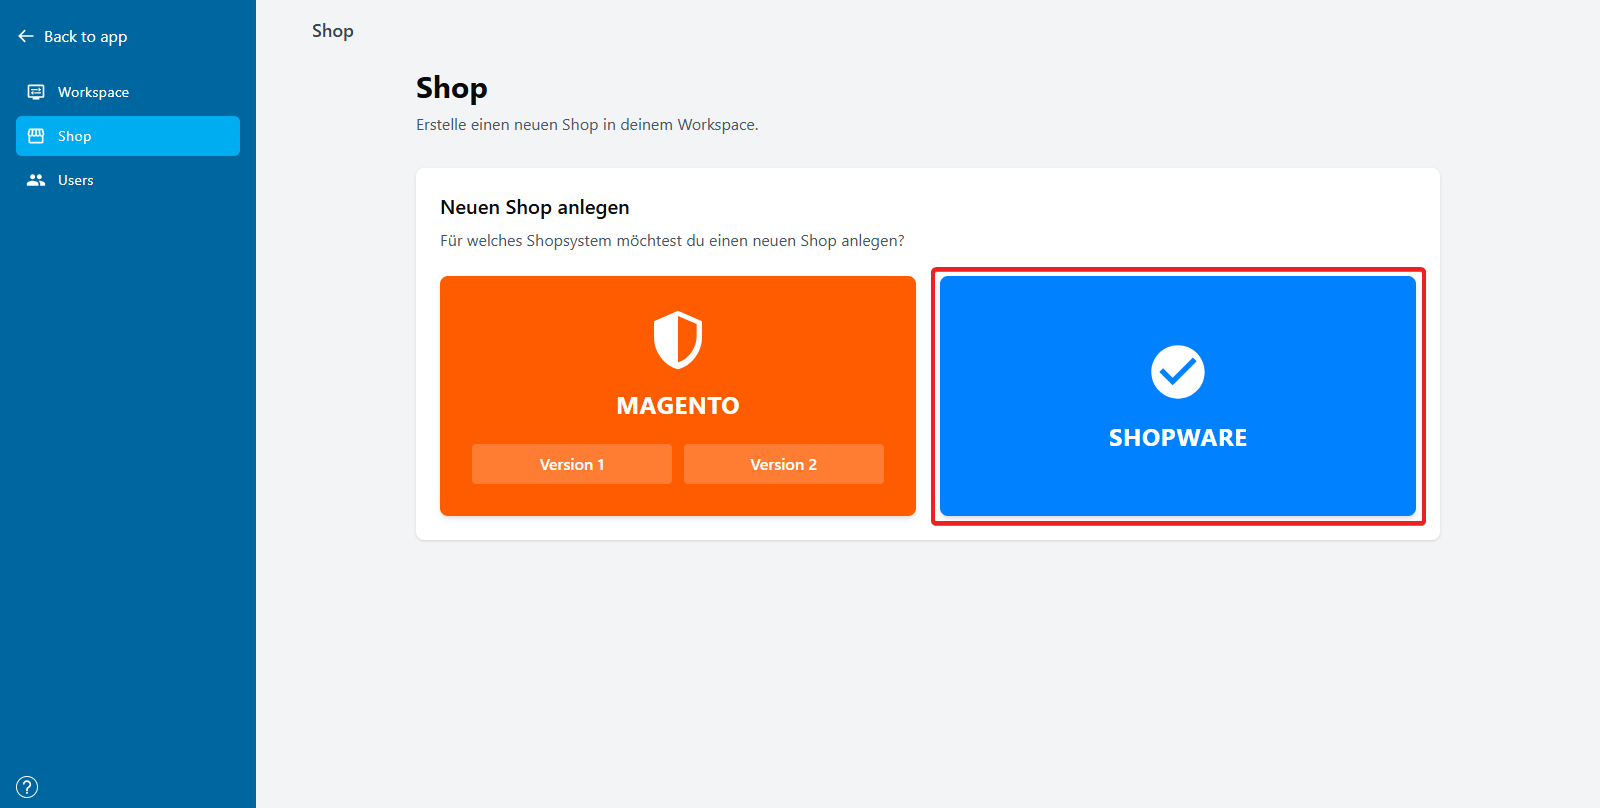
- Select Shopware 6 as your shop system.
- Enter your shop details:
- Shop URL: Your Shopware shop URL (e.g.,
https://yourshop.com) - Access key ID: The Access key ID from Step 2
- Secret access key: The Secret access key from Step 2
- Shop URL: Your Shopware shop URL (e.g.,
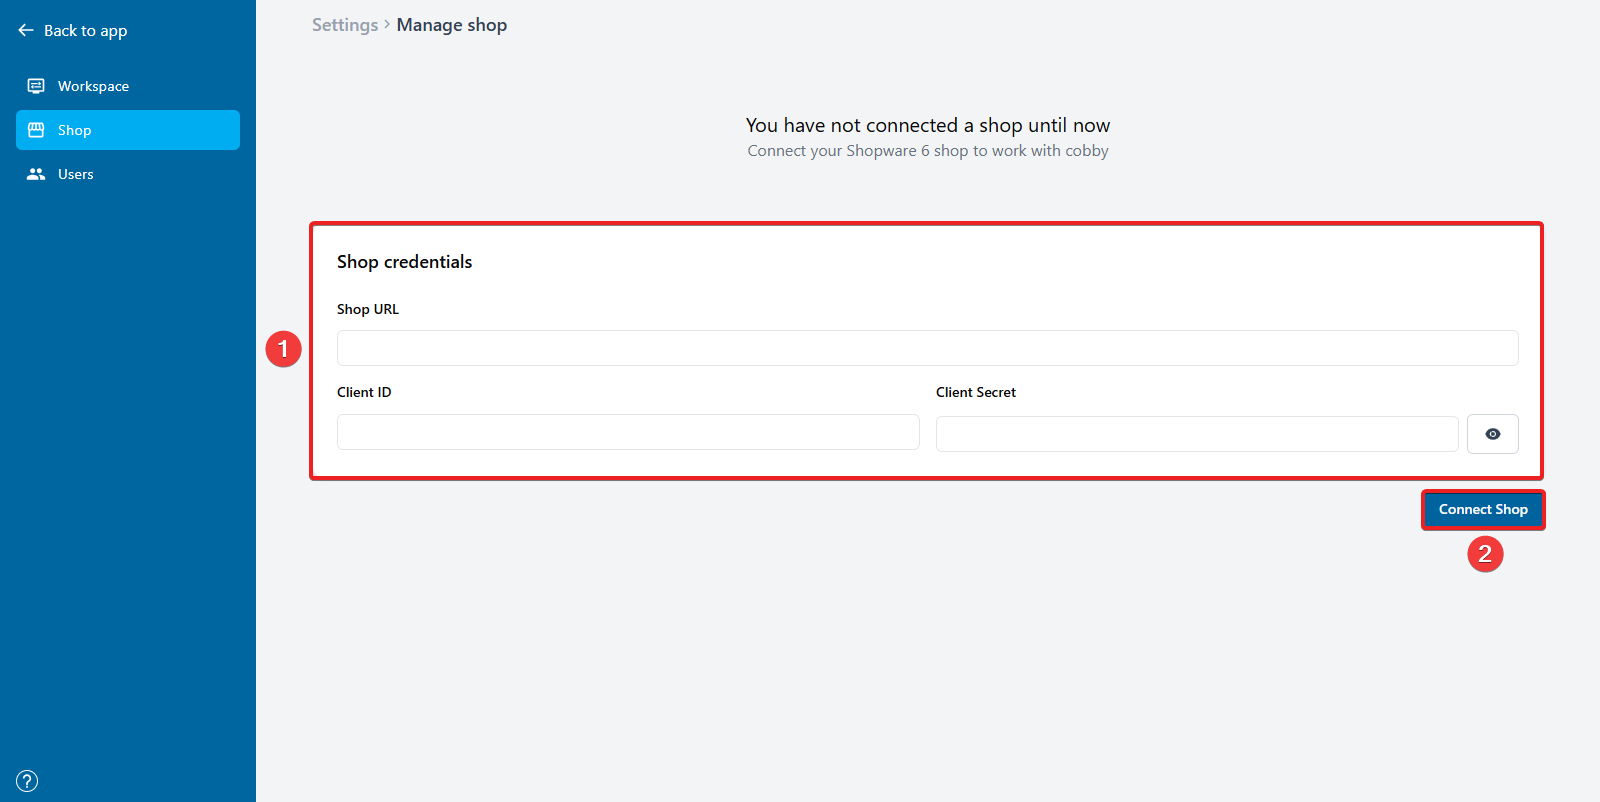
- Click Connect to establish the connection.
Once connected, you'll see your shop listed in the workspace overview.